


Menswear – Why are your trousers getting shorter?
I often stare at menswear in shop windows. And look at mens’ fashion shows. And there is something that I have noticed that makes traditionalists (like my husband) get rather angry. Do you know what it is?
Here is a random selection of TopMan, Moss Bros and Paul Smith suits.


Short trousers!
Nick’s traditional advice on trousers is that they should break at the shoe. None of these suit trousers come anywhere near. In fact the most expensive suit here (the Paul Smith) would reveal the ankles if the wearer was not wearing socks.
At one point I would have agreed with my husband but slowly a new aesthetic has crept into menswear and it has affected women too. My recent jacket purchase (from Jigsaw) has a feeling of being a bit shrunken – the sleeves are short and at a glance appears to have come from John Lewis school uniform department. Ladies trousers too are much shorter than they used to be. Remember how your jeans got all bedraggled at the bottom? Not any more. All trousers seem to be a sort of 7/8 length, or “half mast” as we used to say. In fact my friend Marijana wears her son’s school pants to work. Here are a few examples.


I have been wondering how we progressed from the idea that short trousers on tall boys were a sign of poverty, to the idea that long pants are passe.
Back in 2001 Thom Browne challenged the accepted notion of good style by offering flat front trousers, exposed ankles and sleeves that hit mid wrist.

And with marketing nouse, or even with a sense of irony, they produced their own style guides.


I am not writing this post about Thom Browne New York designer specifically. I just wanted to work out where this look – of altered proportions – was coming from. If your jacket and trousers are getting shorter, if you wear shoes without socks, if you wear tight, tailored shorts to work, or even sports shoes with a suit then you are being influenced by Thom Browne. He doesn’t design hoodies or oversized T shirts with graffiti on – his inspiration is less “street” than the 1960s Mod Suit has been taken to a logical conclusion – these suits remind me of Ray Eames, mid century furniture, Kraftwerk, Japanese precision, architecture and clean, minimal modernism. Some of the designs make me think of the Russian revolutionary wear. It’s like the traditional suit no longer had anything to say to the fashionable youth – it was tired and traditional and overplayed. So Browne introduced fresh elements to ensure the suit would talk to youth; the popularity of Mad Men helped do the rest.
Of course the designs he produces are, like most designer fashion, far too extreme for the average person.


But they are appealing and challenging at the same time. His most recent collection put men into “non-bifurbicated garments” ie dresses. In a time when gender specific labels are being challenged I think this is a good design initiative and I hope it may catch on in the next decade or two.
At the same time there is a version for the masses. Even Mrs Obama wore a nice Browne coat at her husband’s second inauguration. Browne has been doing womenswear since last year. “Women’s is fun but it’s more of a challenge because there’s so much that has already been done,” he says. “Men’s is easier because if you push it a bit, it’s a lot.”
Late Summer Jacket – finding a suitable pattern!
It’s nice to be sewing again. I enjoy the whole process – the planning, the selection of materials, altering patterns, getting a good fit, and the sewing process, although my construction skills are a bit mediocre I must admit. But most of all I like “designing” a look – taking inspiration from fashion history or great designers and literature and art – and putting my own spin on it.

So I decided I wanted a summer jacket in a light colour, preferably pink, with darker buttons (more than one). Ideally in linen and with a soft, relaxed feel while also being fitted in the waist. I did actually start with ready to wear as if I can find what I want I will usually buy off the shelf. Also if you have an idea, even if you intend to make it yourself, trying on something similar can help you work out what you want. This Joules jacket was quite nice and I got them to order it in, in s6 (really I am size 8 or 10 in a jacket but the 8 was quite big, especially the sleeves). Initially it was a ridiculous price – around £150 but I knew it would go down in the sale, and eventually it was available for about £55, but it wasn’t exactly what I wanted. I found the real life pink a bit too deep (the swatch is more what I had in mind), the fabric was linen/cotton mix and I had this idea of five buttons not just one. So I passed.


I asked for pattern suggestions.
Sue N suggested the Gertie/Butterick 5962 pattern, allegedly based on the Bar jacket. In fact on her own blog Gerite writes:
I’ve spent many an hour on the internet looking for a pattern that would replicate the structure of the Bar Suit, to no avail. So I decided it would be the perfect starting point for one of my Butterick patterns!
My view is that it looks a bit like the Bar in the first photograph but I am not impressed with the technical drawing. The shaping in the front appears to be made by some nasty long darts that finish before the hem. The short sleeves make it look a bit like an overall.


Here are some of the other kind suggestions made by readers. I love the cuffs on the Maia but otherwise the convertible collar is not what I want. I discounted the Simplicity 8461 as it didn’t have a collar.


I prefer the first three all have something going for them, and any would allow me to make a few alterations to make it resemble the Chanel jacket.
I have searched for all V 8087 and V1721 but they are out of print and while I could probably get a second hand copy from the US I guess I already own the V8333 and have been meaning to make it up for years. Ruth suggested this would be a good basic design. In fact I have been meaning to make up this jacket ever since i bought it (about three years ago!) but didn’t know what fabric to make it up in. I am so influenced by pattern envelope photographs that I could only envisage this in a dark neutral! But I have some beigey yellow fabric that I could use for this jacket – as a wearable muslin just as it is. Then if it works well in terms of fit I could try again with some design variation.
Now the second idea is to use a 1997 Ungaro pattern. Ungaro worked for both Cristobal Balenciaga and André Courrèges before setting up his own house in 1965. He provided patterns for Vogue from the 1960s to the 1990s, and I have one that I rather like. The styling is certainly a bit dated, but I think I bought this because the jacket is cream! I don’t like the sweetie pie, ice-cream look, especially against a pink background, but this jacket with a darker skirt or trousers maybe the one. You can see the context for this look, with many versions of the jacket, on a nice video of the SS 1997 Ungaro collection available on You Tube.

So here is what I am planning to do.
Idea One
Make up the Schaeffer in a light colour.
Vogue 8333 is not exactly the right design in that it is a more formal and structured than I had planned. But the lapels are wide, the front curves attractively (and this shape is flattering for women with curves) and I really love the little pocket pleat detail). It has three buttons but could be adapted for four. I already have a dirty yellow-beige in my collection that includes linen – perhaps with silk or wool or both – that I bought when I was planning a light coloured jacket for my son Gus (the terrible, unfinished SWAP of 2017). I have a toning piece of yellowy linen that I thought would make good summer trousers or shorts (which he didn’t veto – “I would wear shorts in any colour”). Anyway it is lovely fabric if slightly greyed off for me – but not a warm shade of yellow so it should suit me too (although I suit brighter shades than my muted son Gus). I am going to toile the Schaffer jacket in this fabric. Just cut out my size, without alterations and sew it up fairly fast. Usually I prefer a proper tailored jacket, but I am going to try a quicker construction with fusibles etc. Maybe I can do bound seams rather than lining it – I will think about this. If it fits well I may make it up properly as a tailored work jacket with matching skirt or trousers for the autumn. I just want to check the style so I plan a quick soft-tailoring construction approach. But it might satisfy my craving for a 1940s Coco.
Idea Two
Adapt the Ungaro to make it more Chanel like.
- shorten the jacket by about 3″, from thigh length to hip length,
- slim over the waist on the front, back and side pieces
- develop the cuff
- create four rather than three button holes
- change the outline shape of the collar
- ignore decorative top stitching
- change the shape and placement of pockets
- add two breast pockets
- add dark buttons
By then I may have sourced some appropriate linen fabric!
Making a cardigan
I wear cardigans.
Or “cardis” as we say in Lancashire. In fact the cardi is essentially a bit of a sad item. Workwear of black trousers, a teal T shirt and a black cardi with plastic gold buttons. A white cardi for your holidays “in case it gets a bit chilly” (it always does in Blackpool or Abersoch). A school cardi in maroon acrylic, worn with a polyester pleated skirt – if the static doesn’t get you, you may go up in flames. A man in a cardi – often with a pipe. Something bedraggled and misshaped in a drawer or damp on a camping trip. For me these associations are drab, dreary, baggy and unstylish.
Apparently the cardigan is ripe for a comeback!
Historically the cardigan was a military garment, knitted up to keep the army warm. It was said to have been invented by James Thomas Brudenell, the seventh Earl of Cardigan, although the idea of a jersey with an opening with buttons down the front is probably older. The Earl wore a sleeveless cardigan and made them available for his men. They became fashionable and associated with the man who led the Charge of the Light Brigade at the Battle of Balaclava during the Crimean War. (I will have to do a post on balaclavas one day!)
Then of course, the cardigan was popularised by Chanel who made it into a fashion item rather than a practical extra layer.
And then there is the handknitted cardi. If you look at Ravelry there are a quite few examples of lumpy, bumpy and grotty. Below are Zimmermann specials – nicely knitted I give you – but which leave a little to be desired on the style stakes.


But.
A cardigan is actually a great alternative to a jacket in that it covers (to keep us warm) but also reveals (the blouse or top underneath).
So we need a stylish cardi. A colourful, snappy, shapely cardi. In my wardrobe I have a few nice, cashmere cardis that work well for me – turquoise, yellow, pink. If I wear something plain like a navy dress I find a colourful cardigan can be a nice contrast. These Boden cardigans are the sort of look I prefer.


I am going to make one. So far I have made the Purl Alpaca jacket which isn’t a true cardigan, but does have two buttons.  I want something like this, but I don’t want to use a pattern. Elizabeth Zimmerman has proved to me that I find a pattern that tells me exactly what to do, stitch by stitch, is not for me. And although it sounds arrogant I know I don’t need one. I can make it up as I go along and even if it goes wrong with knitting you can unravel and reincarnate it!
My idea is to knit a seamless sweater – basically from my Zimmermann book – then slice it up the front and knit on a button band and stand. Would this work? Has anyone tried it? This feels pretty scary, not least the idea of cutting into knitting. But I suppose the great advantage is that it allows me to continue developing my circular knitting skills and I know I have a shape and style I like.
I am feeling anxious about the cutting, known as steeking. I shouldn’t be, but of course this renders any unravelling impossible. It is an irreversible mistake if I get it wrong. I also think the button bands on hand knits can look a bit terrible and I don’t know the best way. I will need to research it. Although ribbing is a great finish to provide solidity I like the look of moss stitch (like deliberately uneven ribbing if you don’t know much about knitting). So lots for me think about, and maybe you will be generous with your advice.
I bought some yarn in the Colourmart sale. I love this violet colour. It is merino with 30% cashmere. It is not as soft as the pure Merino, nor as expensive as the pure cashmere at about $13, around £10 for 150 grms, or less than £20 for the cardigan. I think I was inspired by that violet evening coat! I have tried some co-ordinating shades next to it, but I think this time I may try what Sue Stoney and Aida have done and put some patterned stitches into the yoke rather than using colour. Plenty of cogitating time!


And in other news (you may have seen it on Instagram) my dear daughter in law Melanie gave birth to a little boy last week. He’s called William Dexter and he is adorable. So much so that he got 389 likes on Instagram! More than I have ever had, even for the swankiest outfit. So welcome little boy! We are delighted to have a fourth grandchild and very much look forward to meeting up IRL, as they say.
Thinking about a late summer jacket
One of the books I recently read was Thomas Hardy’s Tess of the D’urbervilles. In the book there are many descriptions of the clothes worn by farm workers in the 1880s. I was taken with the description of young women in white summer dresses, and also one brief evocative mention of Tess in a pink jacket. I have searched for images from film and TV. The jackets here are really sturdy blouses, worn over other clothes but not really made for taking off. And in using light colours they were very much summer outwear.
Throughout the summer I have been thinking of making a close fitting jacket with obvious buttons, in a delicate shade of pink. I wanted a top that would go with my work trousers – summery, feminine and flattering. Generally I am not particularly keen on historic, Victorian looks as I am not keen on corsets.
What do I like about this look? Close fitting bodice based on a blouse, large, obvious buttons, clear waist line, light pink.


I want to marry this idea with a favourite Coco Chanel jacket. This is the jacket she designed and wore in 1937, long before the 1954 Cardigan jacket that she is more well known for. And although I have made the “classic Chanel jacket” (and I loved learning the techniques) I have barely worn it. With both my versions I added much more waist shaping as it is, essentially, a boxy jacket. And I feel, currently, that the French jacket is rather hackneyed and jaded and looks pretty dated, especially on an older lady (such as myself). Whereas the 1937 jacket is shapely, revealing the waist by a deep curved cut away at the front, which echos the flamboyant, curved lapels. The shoulders are padded but not excessively so – the sleeve heads also – probably with cotton batting. And I don’t know for sure but I think this jacket may be made out of linen. The jacket has three patch pockets – two lined up with the hem and a breast pocket that may be artfully misplaced. It certainly has a nice white hanky in it, and what looks like a couple of costume jewellery clips. The sleeve is particularly nice with a relaxed, fold back cuff – making it a bit shirt like. Although I expect this jacket is lined it looks very soft and unstructured. I wish I knew more about it! The fourth picture is, I think, of a different but similar jacket, constructed on this occasion without a revere, or collar. Summing up I love this jacket as it is shapely but not tight, a little bit drapy but also with enough of a character, light coloured (natural linen, or possibly wool or silk) with darker buttons, great pocket detail.


Finally I want to reference another great jacket – in some ways the greatest jacket ever – the Dior Bar jacket. This also has two iterations – the original post war New Look jacket has a very neat, petit shawl collar, whereas the later version has a more important notched collar. Both have a pronounced shoulder, a highly stylised tiny waist which is emphasised by significant padding to the hips. The newer version is buttoned to the waist. The natural creamy colour of shantung silk is matched with large but toning buttons. Like the Chanel jacket this one is invariably worn with a full black skirt. Again to summarise what I love about this jacket – light colour with a darker skirt, summery fabric, subtle but important buttons, waisted shape, nice high neck, softened shoulders. Although I love looking at this jacket I would not want to wear something that involved a corset – this jacket is heavy and stiff. 
So I would like to make a jacket that is light weight, very soft and easy to wear, flattering, in light pink linen. The Chanel is pretty close to what I have in mind but now I will have to find both pattern and fabric. The only thing I am worried about is a previous attempt to make a jacket with high break. I didn’t care for it at all when I put it on. I have just noticed that Coco has her buttons undone to just below the bust. The jacket style that actually suits me is the third one – a single button simple, slightly shrunken jacket. I am going to have to give this some thought.


I have a couple of patterns that might work – but I would love any suggestions. Most patterns from the contemporary Big4 companies are very unstructured and drapey. Even Burda which are a bit more fashionable are not really talking to me. And also any good UK or EU linen suppliers? Thank you.
Some suggestions for people with warm colouring
I recently did a colour consultation for a good friend with amber eyes. Traditionally known as Hazel they can look a bit “woody”, including various shades of yellowish green. I find this colouring very fascinating and love looking at light, brownish eyes. Like red hair eyes with a bit of yellow in them can mean someone has warm colouring – not always but it is a big clue. I love the warm colour palette – partly because I have cool colouring and the warm shades do me no favours. But if you have warm colouring wearing warmer, yellowy, sunny shades can just bring your complexion to life.


If you have warm colouring what sort of shades look best?
The key idea is to go for the three or four shades you can see in these irises – khaki greens, yellowy greens, golds, and warm, yellowy browns and orangey shades. If you use these colours for your make up too – brown eye shadows and the deeper greens I think you will find that your skin comes to life. If on the other hand you choose bluish shades you can look a bit washed out and pale. As I draped my client in warm colours her whole complexion came to life and she looked like she had a lovely tan. It was incredible.
Let’s have a look at Demi Moore who has hazel eyes, and rather deep colouring. She may well be deep-warm rather than predominantly warm. But let’s just see what she looks like when she wears the warmer palette. These yellow-based warm shades just make Demi glow – her golden skin just lights up when worn with warm colours. Her best lipsticks are peaches and orangey shades which later on in her career she has worked out for herself.


With her dark hair Demi Moore can certainly wear deeper shades but look at these browns, khakis, burnt orange and gold – so much more interesting than the black and white that she can wear as she has deep colouring. If you find a colour which makes your eyes really “pop” then you can be pretty sure they will suit you. Browns are also so rich and beautiful – although some of these shades are associated strongly with nature they can look sophisticated and dressed up as Demi shows.


Below are some shades that should suit you if you have warm colouring. I particularly like terracottas through to light peach, and the warm yellows like cantaloupe, honey and warm beige. Put these with khaki or teal and you have a brilliant outfit. I once had a tobacco brown trouser suit (not that it suited me) which looked amazing with a vintage “flesh” tone ie light orange. Brick/maroon/pink; Taupe and turquoise; Khaki with burnt orange accents. How I love the warm palette. Happy yellow!

With a warm colour direction always wear shades that include some sunny yellow pigment. Your white is cream, and your neutrals are the warm browns. I know it sounds like a 1970s living room, and this colour scheme was really popular in the 1970s, but warm shades are always in fashion. Currently there are many pinky-peaches, khakis and camel available – these, for example, are from Topshop.


My client last week was Warm with a secondary direction of muted, and thirdly deep. So in her case she will want to choose slightly muted and deeper shades. One suggestion is to choose more patterned fabric such as the animal print or the nice russet check that Demi has chosen for her jacket. I have put together some Pinterest boards based around patterns in nature and in fabric or wall paper that shows how the specific colour pattern works together. If you choose a pattern in your colour direction it can form the basis for many outfits as you can put your other colours with it. This is why the Elizabeth Zimmermann seamless sweater with a colourful patterned yoke works so well as a wardrobe builder – it uses four or five shades which can pull the rest of your wardrobe together. Not all these patterns would be to everyone’s taste (they are from Spoonflower if they are!). I have done this to show how a few well chosen patterns in your wardrobe – no difficulty if you make your own skirts, blouses or jackets for example – can make your wardrobe look more exciting and artistic. I think a long jacket in the camel cowboy print would look good with the whole illustrated wardrobe above. I hope this shows how if you choose your wardrobe around your own personal colour direction you get a situation where everything goes with everything else and you avoid the issue of creating specific “capsules”. Very economic and once settled takes no effort.


Incidentally if you have deep or light colouring these posts may be of value.
Week 6 EZ seamless sweater with a colourful patterned yoke – #EZYokeKAL
For those who have joined me in making an Elizabeth Zimmermann seamless sweater, we are coming to the end. Which may be a relief to those who did not!
This post covers how to finish your sweater; we will discuss hems and underarm seams. Unlike a seamed sweater we are nearly there. Once you have done these processes, which are pretty fast, you will be able to wear your jersey! There is a final stage involving wetting and drying your garment and I will come to that too.
Your average hand knit starts with the finish – either ribbing at the base (or the neckline for top-down sweaters). But Zimmermann leaves this decision to the end. It’s up to you, (many of the knitalong team started with ribbing or similar). That is fine. But me? I enjoy thinking about the finishes (and the colours) while I am knitting mindlessly. I feel, a bit like a naming a baby, each item has its own personality and the right finishes present themselves during the construction, or more usually when it is tried on.
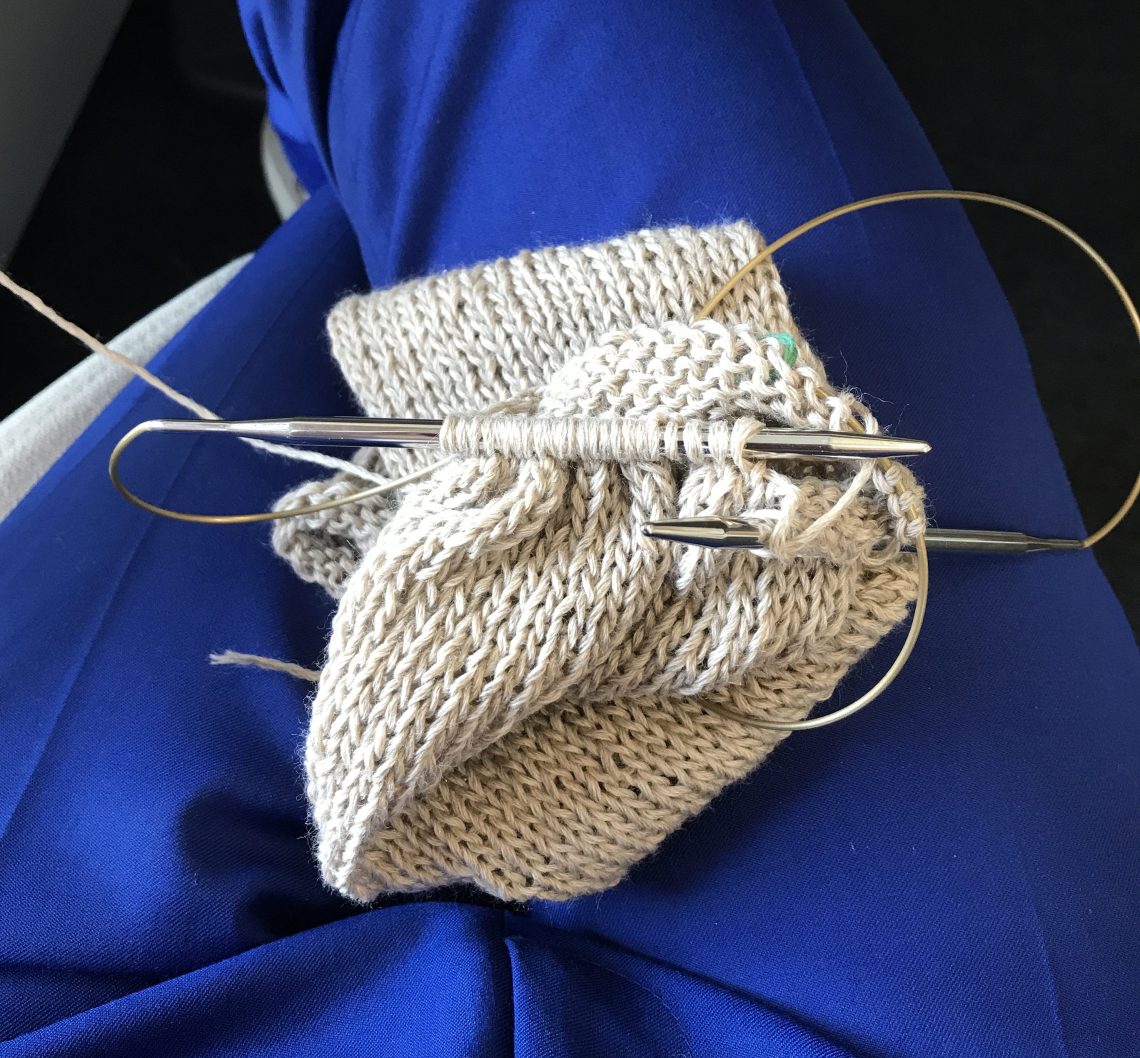
You will have (or you should have) tried on your sweater. It’s easier once you have finished the neckline, but you can try on with the needles still in if you are careful and your circular needles are on the long side. Or you can pull some waste wool through, or use a piece of hat elastic. Looking at these photos I am thinking do I want ribbing or hems? I decided I like the rolling (unfinished) hems and, although I plan to do folded up hems on this jersey – to emphasise the vintage look, I will try the unfinished hems on a future knitted garment.


So today decide how you want it to end. Think through all the openings – neck, sleeves and hem. You can have different finishes. Your options, (to stabilise the stocking stitch that likes to roll in, given the face is slightly shorter than the back), according to Elizabeth are:
- garter stitch
- 1×1 ribbing
- stocking stitch with a hem
We can add, without much trouble
- 2×2 ribbing as I did on my ombre sweater
- moss stitch (as used by Helene)
- just leave the edge and let it roll
OK. We left your sweater, last week, with additional back neck shaping, if you wanted it. The shaping can be done as part of the neckline finishing and I covered this already. I will summarise the ribbing version as it is probably the simplest.
Start at the left shoulder, turn your work and K1 P1 until you get to the right shoulder, slipping the first stitch every time. Add two stitches from the remainder at the end of each row, then turn, slipping the first stitch again, and keep the ribbing pattern all the way back to where you started (left shoulder), adding two more stitches. You are adding two stitches on each row, knitting back and forth, until you have done six rows. Now continue right round the whole neckline, knitting up the stitches from the front of the sweater, adding about one inch to the ribbing depth. The ribbing on the front is much shorter than the back, but it is barely noticeable in wear

Sleeves and Hem finishes
With the sleeves and hem you need to pick up one stitch for every stitch at the base of the sleeves and sweater – then rib it, or make a hem. I will describe the hemming process which I had not tried before I met Mrs Zimmermann, and I like it. The hems make a sweater very comfy to wear and look old-fashioned which pleased me. Also as a dressmaker they are more similar to what we are used to.
Hemming
Knit up the stitches on the lower edge, taking them from behind the cast on stitches so that you have a neat finish.

Knit one round, then reduce the stitches by 10 per cent, by knitting the 9th and 10th stitch together. This just pulls it in a bit and stops it being bulky. Then knit a hem the depth that you want – one to two inches. Instead of casting off -you stitch, loosely and with a blunt yarn needle the stitches to the sweater. This means minimum bulk and smooth wearing. Nice!

If you want a hem at the neckline then do one round of purl stitches around the neckline, then continue as above. This makes the hem turn in OK. Mrs Z didn’t tell me this – this is my contribution. I hope it works for you, but do share if you have a better idea.
Underarm seam – weaving/grafting/Kitchener stitch
Use a blunt darning needle and a long piece of yarn to make the join look almost invisible. It’s a great finish.
Here’s how. Pick up the stitches you have on waste yarn loops, say 13 from the sleeve and 13 from the body. Arrange on needles so that the wrong sides face each other so you have a front and back needle. Keep the loops loose and do this exactly as it says even if you have to do it more than once.
*Pull wool through the first stitch on front needle as if to knit. Take stitch off. Pull wool through second stitch on front needle as if to purl. Leave stitch on. Pull wool through 2nd stitch on back needles as if to purl. Take stitch off. Pull wool through the 2nd stitch on the back needle as if to knit. Leave stitch on. Repeat from *
After doing this pull up the stitches carefully and it will look like it is knitted together. The long yarn ends are used to sew up the little hole that still remains. Do this as neatly as you can.


Soaking, blocking etc
I haven’t got much experience of this so can’t give great advice. My seamless sweaters have been made in Merino yarn or cashmere. I just wash them on a cold wash in the washing machine, then lay them out flat on a towel on the floor, and make sure they were even and shaped well. This is how I wash knitwear any way. Works for me. Please comment below if you have any better ideas.
Another momentous week
I am not sure how many of these I can take!
Last week Notting Hill Housing, where I work, announced our intention to merge with another large housing association.
Notting Hill owns around 30,000 homes in London, and we decided to come together with another similar organisation called Genesis, which owns a similar number of homes. Like Notting Hill, Genesis was formed in the 1960s as Paddington Churches Housing Association in response to appalling housing conditions in west London. Paddington, where I live, adjoins Notting Hill which is the next “village” along. In fact here is the road marker, with us trying to get a good picture. In the photo (left to right) is Neil Hadden, the Chief Executive of Genesis, Linde Carr from Notitng Hill’s board, DIpesh Shah who is the Chairman of Genesis, me and Elizabeth Froude who is the Deputy CE at Genesis. And that little grey square Elizabeth is pointing to is the old road marker. But no-one can read it! Also Neil can’t actually kneel, as his knees are a bit creaky.

Paddington Churches and Notting Hill are both great organisations with the best history and now an amazing future. I am hugely excited by this development which will mean more affordable homes for Londoners (an additional 400 new homes a year, on top of what we already do independently).

This one is of some of our Notting Hill staff the morning we gave them the news. As you can see most seem pretty happy. Although I am shocked how many buy a coffee on the way in. We provide real coffee and instant, hot chocolate, several version of tea and squash at work. But there you go…
I have been working on this project, with lots of my team and the Genesis team, for months. It has been hard to do it on top of our day to day work, especially as the Grenfell fire punched a hole in our lives. Having this project to deliver really has taken it out of me – it can be stressful negotiating everything from the new name – which will be Notting Hill Genesis, to going through a recruitment process (I am delighted that I will become the CE of the new organisation at legal completion early next year), to deciding how to integrate two huge organisations (Elizabeth will be doing that). Dipesh will be the Chairman and Linde will join the new board which will be made up of ten NEDs – five from each organisation.
Anyway in the meantime we celebrated Kit’s 3rd birthday with an indoor party because of the rain.
The cake – the first one not made by my husband (he did make the sourdough bread and the roast beef) – was an amazing rainbow cake. Unfortunately chocolate, 3 year olds and a light pink sofa are not the best combination. Anyway the grand children have since been to Italy for a holiday and are now with us in the Cotswolds. The summer holidays are here for us!


I am looking forward to using my new sewing room, now it has been “christened”. I was really pleased to use it, having brought across a good portion of my tools and supplies. I feel the wonderful light room, the fact that it is purpose built and so inviting has tempted me to get on with my sewing. A coat I started while all my equipment was in a suspended state came out and I managed to construct it. It still needs shoulder pads, sleeve heads and lining but I am on the home straight. That feels like a breakthrough.


Last week we invited some friends round for lunch. Elly works with me and is a good friend. She kindly gave Nick a needle felted badger made by her Mum. We have lots of badgers locally and Nick is a real fan, so he was very pleased with the lovely gift.


I think I have been very preoccupied with the merger and it is nice to have a little break. We have a whole week in the Cotswolds. I will be doing some sewing, and some knitting, and entertaining the children, and swimming and relaxing. But I will also be reading and commenting your blogs, and blogging myself. I have been rather out of touch at weekends as we have not had the internet in the country. But now we have just heard we have finally – after nine months of waiting, nagging and pressuring, waiting for engineers, getting contradictory information, countless phone calls and in the end making a formal complaint to Ofcom) – finally got the internet. This makes our life complete!
Week 5 EZ seamless sweater with a colourful patterned yoke – #EZYokeKAL
This week we are knitting the colourful patterned yoke for our seamless Elizabeth Zimmermann sweater.
And here, to get you in the mood, is the inspiration picture from Knitting without Tears.

Although the picture is grainy. I was enthused by the retro look. (If you ask me Mrs Z is better on the design side when she makes traditional items in the 1950s, rather than earnest 1970s experiments). Having made it up twice in pink and blue remnants this time I decided to make it up in 1940s colours. I went with teal, red and lemon.
As usual Mrs Zimmermann doesn’t instruct you precisely so the patterns and the exact shaping are down to you. Let’s go through the stages.
Bringing it all together
Before you join the sleeves and body you need to put a few stitches from each sleeve and the same number from each side of the body onto waste yarn or a safety-pin. This is so you can knit in the round despite there being three cylinders. The left out stitches will later be woven together under the arms in a nearly invisible join. How many? Again go back to the number you first thought of and find 8%. With my 160 stitches that means I need to take 13 stitches at the underarm. The exact number doesn’t matter too much. 11 will be fine if you are using DK.
Then the exciting moment comes when you join them all together on your circular needles. Here is the charming diagram – and I am sure it is in Elizabeth’s own hand. The Zimmermann enterprise of self publishing has a warm, wholesome and “non-expert” style which is rather appealing (although some of her designs are just a bit too earnest for me – another time – we can have a laugh).

Elizabeth Zimmermann emphasises that they must be diametrically opposite so I will leave you to count the stitches to ensure this is the case. You want the back and front to be the same width.
Sizing
Now let’s talk about dimensions. EZ tells us that the depth of the yoke is about 1/4 of the body circumference, so 8″ for me. You will have to take your own decision on this but for me that is way too long. If you look at the top picture you will see that the jersey seems to come right up to the chin, creating a sort of turtle neck look. My advice, if you want a more elegant neckline, is to make your yoke about 1/6 of the body measurement. My three sweaters are about 6″ deep (from the start of the first round of joined together knitting to the start of the back neck shaping/ribbing etc. It’s a design decision and one for you alone, but I found the neck too high.
Anyway you need to decide on the overall depth before you decrease, as EZ’s decreases are at the 5″, 7″ and 10″ points. You have to work out when to narrow your yoke depending on the overall depth of the yoke and the arrangement of your patterning. I just put my three decrease rounds in, after each motif. Finish the motif, do one round of background colour knitting, then one round of decreasing. The decreasing with this style of jersey is, as Mrs Z writes, “brutal” in that you knit 1, knit 2 together until you have finished the round. It is satisfyingly quick and means once you get into it the jersey is finished fairly fast. For reference, on my current sweater, I decreased at 5″, 6″ and 7″.

Colourwork patterns
Now comes the crescendo. You are going to knit in colour! You have had five weeks to work out what colours you are going to use. But if you have used a gaudy wool – Sue Stoney I am looking at you – you won’t want to do any colour work. Never mind. This jersey is lovely as a plain jumper.
For colourwork knitting I have some tips for the actual knitting here.
What about designs? You can use the ones EZ supplies, get them off the internet or from a book, or you can make up your own. For the first two versions I used EZ’s suggestions and a couple of my own ideas. For this one I exaggerated EZs ski-sweater lozenges, and added a kind of strawberry – suggested by my beige and red yarns. I have reproduced it (below) if you want to copy it. On the other hand it is easy to make up your own motifs. The only thing to remember is that there have to be the right number of stitches – you don’t want half a motif. So you will need to count to ensure your motif will fit precisely. With my strawberry it has 6 stitches and I needed to decrease an extra stitch to fit it in. This is fine. Just do it! Increase or decrease discreetly.

So you do your first motif and a second one if you like, until your knitting measures about 5″ deep from the underarm. Then you carry on until your yoke is deep enough, you have all your colours in, and you have done your decreases. EZ says you should have about 40% of the stitches you first started with on your body. In my case this would be 64 stitches. The truth is this time I only did two rounds of decreasing as I wanted a slightly wider neck. So I finished with about 80 stitches. I didn’t want to say this as it might confuse you. On my first two sweaters I did the three rounds are got to about 60 stitches and that was good. I just prefer a more open neck.
Back neck
Building up the back neck is a key, almost defining, feature of a Zimmermann creation. Many modern top down and seamless sweaters include it. Mrs Z even goes so far as to say “We come to the most important part of the whole sweater – the back-of-neck shaping.” Her italics. I don’t agree with this statement.
As a dressmaker you will know that the back is different to the front, and I am not just talking about bust shaping. Our backs are longer than our fronts and curve outwards over the shoulders into the neck. This is why a bodice block will have small darts at the back shoulder. So there is a case for fixing it when you make a knitted item, especially when it is essentially a boxy tube. There is also a case for making the back length a little longer but this is not possible with a knitted in the round tube. So I suppose giving a little extra length at the back neck helps counteract the issue we have with the front body being shorter than the back body. Two of my sweaters have it (pink and blue ones) but with my newer one I left it off and I have created a nice neckline that doesn’t come up high. So what I am saying is – it is optional. And here is another idea from a very experienced knitter.
If you want the back neck shaping the principle is that you do short rows from the left shoulder position to the same place on the right, first doing a purl row, then a knit so that you keep the stocking stitch pattern. Each row you must knit or purl two extra stitches from the remaining stitches to make the new slope smooth. You do six short rows. Then you knit around the whole circumference. I have previously done short rows using two different techniques to this and I think some of the more sophisticated approaches are better, but I have no expertise here. You may like to consult an expert or the internet.
How this works out depends on how you are going to finish your neckline – it is probably easiest if you decide on ribbing as you can do the whole built up back neckthing in ribbing – which avoids knitting purl rows, and this is indeed the approach Elizabeth Zimmermann outlines in the book. I ribbed on my pink and blue sweaters, giving a deeper rib at the back. But if you are going to finish the sweater with a hem (like I did with the beige jersey) you can build up the back neck on the body of the sweater first. Which I didn’t do this time in order to have a wider neck.
I am sorry if this sounds complicated. The knitting is not complicated, but the decisions maybe trying. I will just give you pictures of my different back necks which might help you make the choice.


We are also sliding into the area of finishes, but is the topic of my final post next Saturday. Can you wait? The end is near!
In case you have stumbled across this blog, or have been following and now want to join in, here are the first four posts. Do let us all know how you are getting on!
Balenciaga – part two
The Balenciaga exhibition at the V&A starts with some examples of his work inspired by his Spanish heritage. For any designer their own background and experience will always come through their work, to some extent. But Balenciaga, who may be the greatest ever designer in terms of technical skill and ground breaking design, is always a Spanish designer.
The display case includes several obviously Spanish items. Black lace, as found in the Mantilla, layered over cream silk looks stunning. Beige lace, thickly encrusted with red florets, bows, lace work and heavy embellishment. And a stunning flamenco style dress from 1961, sit alongside matador jackets offset by a series of hats which have come from the bullring, the street dancers, the church and the agricultural worker. Balenciaga, as a result of the Spanish civil war, came to Paris where he set up his business in 1937. Maybe the dislocation intensified his affection for the styles of Spain, but I think Spain has a richer cultural tradition than most of Europe and these influences come through very markedly in nearly everything that he designed. Oscar de la Renta, who began his career as Balenciaga’s apprentice claimed that “even after his success in Paris, he remained very deeply influenced by the culture and folklore from Spain, from the religious to the gypsies, flamencos and bullfighters.” The highly stylised shapes and sumptuous fabrics that characterise Cristóbal Balenciaga’s work, sprang from traditional Spanish costumes.


These dresses are so beautiful, radical and absolutely different to the fashions of the day. His approach was truly original and ground breaking.


From the world of Spanish art Balenciaga is influenced by Goya’s portrait of the Duchess of Alba in a head enveloping black lace mantilla to create the amazing black silk gazar outfit known as a “chou” wrap, dependent on the stiffness of silk gazar, while the evening dress is made from fluid black silk crepe.


Velázquez’s “Las Meninas”, one of the greatest portraits of all time, and worked on by everyone from Picasso to Francis Bacon, influences Balenciaga’s ivory silk satin “Infanta” evening dress with scrolls of black velvet along the neckline and waist, and accentuated fullness over the hips, supported with panniers or padded hip under structures. The dress has a long metal zip up the centre back.
![Velázquez Las Meninas
[part]](https://i0.wp.com/fabrickated.com/wp-content/uploads/2017/07/velazquez_lasmeninas_det2-e1500912569703.jpg?fit=1097%2C1414&ssl=1)


Other influences from life include religious vestments and robes he saw up close – his uncle was a priest and he was an altar boy. At the V&A there is ample opportunity to actually study how these enormous, voluminous garments were designed and worn. I really found this part of the exhibition very exciting and interesting as the modern toiles and diagrams reveal how the garments are designed, cut and constructed. These stiff shapes are held away from the body so that the underlying body shape is both disguised and enhanced. They also have the effect of making the wearer look vulnerable and ethereal.
![construction details [no side seam]](https://i0.wp.com/fabrickated.com/wp-content/uploads/2017/07/2017-06-23-16.21.43-e1500913176932.jpg?fit=3024%2C4032&ssl=1)


Although the exhibition includes just the one black reimagined cardinal’s chasuble, this idea is repeated again and again in Balenciaga’s work – as a regal violet velvet evening coat with a huge shawl collar; as a black coat with an enormous cape which makes Lucky, the model, appear to be a tiny, elphin head (topped with a confection); now as a huge, orange evening coat with a huge statement collar, set off by delicate black accessories. Do the ladies in the fashion show look with interest, envy or shock?


Likewise, the amazing catwalk of perfect black dresses in the V&A cabinet, each one unique and each one challenging existing trends – he made one each year – are inspired by the black clothes that became a uniform for the widowed women of the Basque country.
On both visits to the exhibition it struck me that Balenciaga is not as well known as many modern designers who may be marketing geniuses, but are not great craftsmen/ women, with limited design imaginations. Balenciaga shunned publicity and never gave interviews. His breath-takingly original work was appreciated mainly by very wealthy European women, but his name is not known in many households. This exhibition is the beginning of a fight back. In researching the article I found countless examples of the most exquisite designs, season after season, unique novel, inventions over a long and very productive life. I loved the V&A McQueen exhibition and really think he had a very special talent – but the V&A – aware of the bankability of the fairly recently deceased designer – spread his much more limited work over several galleries. The Balenciaga is crammed into a small space and I feel it needs to be bigger, with space to breathe. And more examples. Perhaps this is a task for the Spanish – a blockbuster exhibition with several more items borrowed from galleries all over the world.
I must end with a question. How far do you design or make items that stem from your own national or local or cultural roots? As an English person from the Lancashire cotton mills, with Scottish blood I find myself continually attracted to both wool and cotton, to tartan, to tweed, corduroy, to soft heathery colours and English summer florals. I like the English designers and the royal outfits. Do you connect with your own heritage and does this come through in your dressmaking?
Week 4 EZ seamless sweater with a colourful patterned yoke – #EZYokeKAL
Today I am going to cover the sleeves on our Seamless sweater with a colourful patterned yoke.

The yoke sweater really needs sleeves, although I have been thinking about a sleeveless version. Maybe you could make very short sleeves – a couple of inches – just to finish the sweater off?
Determining the length of the sleeves
I don’t have long arms and I don’t like long sleeves, but the length you make your sleeves before you join them with the body is very much a personal choice. Measure from the underarm (or actually about one inch down), or measure the jersey you already have that fits well.
For me bracelet length is about 15″ and full length is 17″. Mrs Zimmerman says the average woman would want an 18″ sleeve, but this is a little long for me. Maybe you like to push up your sleeves or fold them back in which case even longer than 18″ is OK. So having got the length in mind, we can move on to the width.
The width of the sleeves
The sleeves, like the bodice are knitted in the round. They are just two tubes that will be joined to the bodice when we create the yoke. They taper a little towards the wrist, unless they are made for a child in which case they can literally be tubes. Elizabeth Zimmermann uses a very simple method to decide how many stitches to cast on. Divide the number you first thought of (ie the number you used for the bodice) by 5. Cast on this number of stitches.
Let’s say you have 200 stitches – divide by 5 to find 20% – and it is 40 stitches at the wrist. My bodice has 160 stitches, so I cast on 32 stitches. Easy!
You add two stitches every fourth row until you have 33% of the bodice – roughly divide by 3. With 200 stitches you would have about 66; with 160 – 52 stitches. Also easy! When you get to the larger number just keep knitting straight until you have the length you want. Incidentally I knitted the bodice and one sleeve and still had some yarn left (150 gram cone).

Now two questions remain – how and where to increase and how to knit a small tube.
Increases for the sleeve
Mrs Zimmermann doesn’t specify where exactly to do this, but my advice is opposite your beginning of row, but you could do it at the beginning of the row if you prefer. Use a marker. After the marker M1, K3, M1. EZ suggests that you make 1 (M1) by just looping the yarn around the needle to make a nice, neat unobtrusive new stitch. The three plain stitches in between the increases means you have a nice pattern of increases on the underside of the sleeve. I guess you could do them another way if you prefer but I have used her method and I like it better than other approaches I have tried.
Knitting a small tube
The Zimmermann method is to knit the ribbing or whatever at the end. I like this idea and will explain it in the final week – week 6. Next week – week 5 – we are doing the yoke and the optional colour work. But you can rib 1×1 or 2×2 or moss stitch like Helene if you like, but I am assuming everyone else is sticking with the simple tube at this point.
You know what you are knitting but how to do it?
- dpns
- dpns to start it and swap to circular needles on a short wire
- magic loop
I can’t advise on either of the first two methods as they involve the double-pointed needles. I had one go at this and all my stitches fell off randomly and I hated it. One day I may learn to do it as I think socks appear to be made this way and I look forward to the challenge. For me the only way to go is magic loop.

This is a weird thing as magic loop is regarded by some as unusual and somewhat exotic. I know several experienced knitters who have never tried it. The truth is I tried it as I didn’t want to buy a second or third set of needles, and anyway the small circumference circular needles don’t come in every size of needle. So I thought before I buy more needles I will give it a go. For magic loop you can use the exact same set of circular needles as you used for the body. I did – as a complete beginner – on my first ever jumper, and I found it quite easy with great results. I searched for magic loop on the internet and watched a Youtube video. So give it a try unless you are already adept with those dpns. I suggested this to Giorgia and she gave it a go and is a convert too.
I have a few of magic loop tricks that I like, that may be of assistance.
- Cast on the required number of stitches – 32 in my case. Now divide them roughly in half so that the first 16 or so are on the left needle
- Then comes a loop
- Then the remaining stitches
- Then a loop and right hand needle has no stitches on it
- Using the right hand needle knit the 16 stitches
- When knitted let all the stitches come together on the wire
- Then take the remaining 16 stitches, plus a few of the already knitted stitches, and put them onto the end of the left needle and repeat from 2.
- You are pulling the first loop through at different points so you don’t get an obvious line through the work
- Also when you take the yarn from the stitches that are on the wire rather than a needle be careful not to pull too hard as they will shrink and become too tight
- But equally you don’t want them to be too sloppy and loose, so keep them close to the next stitch.
- It is impossible to explain this in words. You need to watch a video or ask someone to show you.
Conclusion
The sleeves are quick after the bodice. The increasing is regular and fun. I must admit I hate counting rows and some of my increases come after five or even six rows rather than the four recommended. I don’t suppose anyone cares. Once you have one sleeve, you need to do the next one. The sleeves are more portable than the bodice and much more portable than once you join the whole sweater together, so if you like to knit when travelling you could do the sleeves concurrently with the bodice. Once you have done the two you will be ready to start on the yoke, which I will go on to explain next Saturday.
How are you getting on?
You must be logged in to post a comment.