


Hand made shoes?
Espadrilles
One of my friends, Suzie of Suzie London, came to our Morley college draping class, wearing these. Hand made espadrilles! You can buy the soles to make an espadrille on Amazon and at John Lewis, but the twist here is that Suzie has printed her own design on to fabric using her home printer! Her shoes were very comfortable (I tried them on) and she is selling them on her own site. But you too could make summer footwear to match your outfit. There are quite a few patterns available on the internet to make the last. Suzie has lined hers with a yellow gingham and printed her own logo onto the sole.

Fabric ballet flats
Shoe designer Cheri has a Shoeology selection on Etsy. These are really cute too. I can imagine these shoes made up to match an outfit. The shop owner, who sells a downloadable pattern with instructions, says you can make them as indoor shoes or apply a flexible rubber sole (she has a video to show you how).

Leather shoes
And finally I saw some offered by North English company Simple Way. I came across this company at the Knitting and Stitching show at Alexander Palace and I really liked their leather handles that you can sew on to a bag. They provide satchel and other bag kits that you can stitch up yourself. And shoes. I am not sure the designs are really my cup of tea, but I like the idea of being able to choose the exact colour you like and make them up yourself.

Some months ago Carolyn showed how she had made herself some shoes from wood and leather. She is one adventurous seamstress.

I have made coats, hats, gloves and lingerie. But I have never made shoes. Have you?
What’s with the LBD?

The Little Black Dress was probably invented by Chanel in the early 1920s, although it has had numerous iterations. Generally it is a short length, relatively fitted sheath dress, which can be dressed up with jewellery and is usually worn with darker tights and high heels. Until this point it had been the norm to wear black for mourning and it would have seemed quite radical and shocking for ladies to choose black for day or evening wear. Since then the LBD has become ubiquitous and you can get one for £11 from Asda. Every city in the UK, and many other countries, you can see young women tottering around on high heels with clingy body-con numbers, and at dinner parties in Knightsbridge they wear the uniform too. There are LBD’s made from cheap polyester and there are some in the finest silks and wools.

An LBD should be a classy, elegant, cool, ageless look. It should make the woman look a little mysterious. The idea of a non-colour, basic shaped garment is that it should draw attention to the individuality of the wearer. But if you have ever been to a black tie event where all the men are wearing black tie (tuxedo) you will see that this is a tall order.
What we are talking about is
- evening wear
- elegance
- class
- restraint
- femininity
- high quality
It is received wisdom that every woman should have one in her wardrobe because it is universally flattering and can be “dressed up or down”. Unfortunately like the white shirt, the LBD does not suit everyone. However everyone can wear a version of the look, so long as it is not too literal.
If you have deeper or brighter colouring an LBD can look great. It will make you look slimmer as it is a colour which recedes. If you wear a very well fitted sheath dress it can also be slimming as it skims the curves and, in being one piece, it makes you look longer and slimmer. Choose an elegant, simple shape made from good quality materials such as silk or wool. If you wear dark tights and shoes too it will make you look longer and slimmer than virtually any other look. If you are already tall and slim you could consider well tailored trousers and a tuxedo type jacket, or a close fitting luxury top such as an embellished cardigan or satin shirt with diamond buttons, in black or another deep colour. The same rules apply on wearing a long column of a single, deep shade – match your tights and shoes too for maximum slimness and length.
A maxi dress is a good choice – it doesn’t have to be a full on ball gown – in fact the sticky out silhouette of a ball gown is not the effect you want. Look for a maxi that falls from just beneath the bust or with a high waist, and a fluid skirt for maximum lengthening of your body. High heels with a dress like this makes you taller.
Does the LBD have to be black? Not really although it is a great shade if it suits you. However the other deeper shades – dark chocolate brown, midnight blue and deep purple – are all traditional evening wear shades (men sometimes wear evening jackets in these shades). To my mind looking a bit different is always good. If, like many people, black is not your colour wear your darkest shade. This might be a bottle green, or deep red. How much more interesting this would look than a dozen women in LBDs.
Here am I in mine! I made this dress for SWAP 2015 and it is nearly black. I wore it this week for a “women’s network evening” we held at work. I had been meaning to make “my” LBD for ages. It is made of a drapey navy silk and I really like the shape and style. It is a classic 1960s dress with the additional accent of lace dinosaur sleeves. Also by wearing three silver chains (bumble bee, elephant and shell) I get some brightness and lightness into the outfit. This week I wore it with thick tights and brown brogues. But for a dressy occasion I would wear “nearly black” or navy sheer tights. However on all those occasions when a LBD is considered “essential” I love to turn up in a coloured dress because I prefer colour, and I like to stand out.

If you have cool colouring try navy or dark brown.
Warm colouring would look nice warm deep neutral – a deeper warm brown or green.
Bright colouring is complemented by either an LBD or a bright colour such as red or emerald
People with Muted colouring could choose a deep, soft blue, purple or red
Finally for people with lighter colouring you could try a dress that is light near your face but includes black or a deeper shade too.


Accessories
Generally this is an opportunity to wear a higher heel, and elegant, strappy shoes, or traditional court shoes, will complement your dress. With the LBD look keep the jewellery in the classy league – gold or silver (depending on your colouring), or pearls, or diamonds if you have them. If you don’t have any “family jewels” wear an upmarket high street type item, in a toning colour with your dress. But take care not to cheapen the look. At heart it is a classic look. (This is of course only my opinion. Lots of women wear the LBD for everyday supermarket shopping. Although I am wondering if that is a mail trolley, a trendy pull along behind pram, or just a portable street dustbin behind this glamorous pair).

A question from a reader
I love questions from my readers! I like to problem solve. Let’s be honest I love problems. Sorting things out makes me tick. Joyce asked how to ease in a sleeve, so I wrote to her directly. Karine asked for a view of President Omaba’s beige suit. Another reader requested advice on a reversible dress. I am so flattered that people think I have something to offer. Of course I am not an expert really but I will have a go, and make suggestions if I can. But last week I got an enquiry last week that I am not sure how to answer, so I will share it with you.
Rachel Goodyer writes:
I request you blog about superb easy patterns for beginners. I’ve loved the Vogue wrap dress and have made three. I’m looking for patterns that are easy but with style and that wow factor.
I have written back and asked Rachel what sort of style she likes beyond the DVF-type jersey wrap dress. When suggesting patterns as well as the level of skill required (beginner) we really need to know something about the wardrobe personality, and if you have a straight or shaped body outline. I haven’t heard from Rachel, but let’s assume she has a classic wardrobe personality and a shaped body. This I surmise from her enthusiasm for the wrap dress (but I could be wrong – “wow” may mean she is a dramatic!).
Now I need to state that I am not very au fait with the wide range of commercial patterns available, as I tend to use second-hand, vintage ones, or I make or adapt my own. The main reason for this is that I am fairly stingy (new patterns can cost £6-£15), and I don’t think the date matters too much if you are just looking for the basic shapes. The classic shapes don’t change very much over the years.
However there are many great bloggers out there who follow the most up to date trends, are much more prolific than I am, use contemporary commercial patterns, so they have a lot more experience than me. I am thinking especially of Ruth and Fairy who are both encyclopedic in their knowledge of what is available, what is nice to make and might suit a beginner. Ooobop regularly reviews what Burda has available. My friend Lyn is fairly new to sewing too and she may comment on patterns she has tried. Maybe other readers could make suggestions for Rachel.
So, as someone who doesn’t always answer the exam question, I will provide you with my suggestion for a beginner who wants to sew a few great items.
I would start off with a fitted skirt – either a pencil or a flared skirt, with a proper waist band and zip. I would make a few versions until I got a good fit. I would play around with the pattern – trying different fabrics and lengths, different depth of waist band, perhaps include patch pockets or trimming, then with a lining. I would keep going until I was happy with how the skirt fitted, and I had a great looking skirt. You can get an old pattern on eBay for a pound or two, or you could draft one to fit you (it is not difficult).

Then I would work on a sheath dress, or perhaps a princess line dress, in the same way. I would be focusing on fit and technique. You can see how most patterns offer a few variations, so you could do both these dresses and then include your own variation – maybe a V neck or a more revealing back. Shorter? Full length (with splits), shorter as a tunic top to wear over trousers?

I haven’t yet talked about style or wow factor, but for me the wow comes from getting a good fit and using a really attractive fabric. I know that some of the designers have created wow outfits with amazing asymmetrical features, pleats, ruffles, patchwork combinations, volumious pockets, arty belts, and unusual silhouttes, but as a Classic dresser (with a little twist) I am less attracted to details, and more interested in line, structure and an elegant (figure flattering) look. I do like interesting pattern cutting and would happily wear Vivienne Westwood. While I like the classic shapes I am not particularly conservative.
Next I would move on to a blouse or perhaps a shirt-dress – something with button holes. They are not terribly challenging with a modern sewing machine, but need to be conquered. The collar and cuffs are also challenging but keep going. WIth this pattern you get a nice flared skirt too!

Then I would make a jacket. By now you may be regarded as an experienced beginner or intermediate seamstress. It doesn’t have to have a collar to start with.

I am sure others will have more sensible suggestions in response to your query. I appreciate the question and welcome any topics for blogs or questions about style, colour, design or construction. I will do my best to help.
Lots of love from Aunty Fabrickated.
The yellow coat that became the yellow jacket
You may remember I am supposed to be making a yellow summer coat for my daughter, based on this one, from Zara.
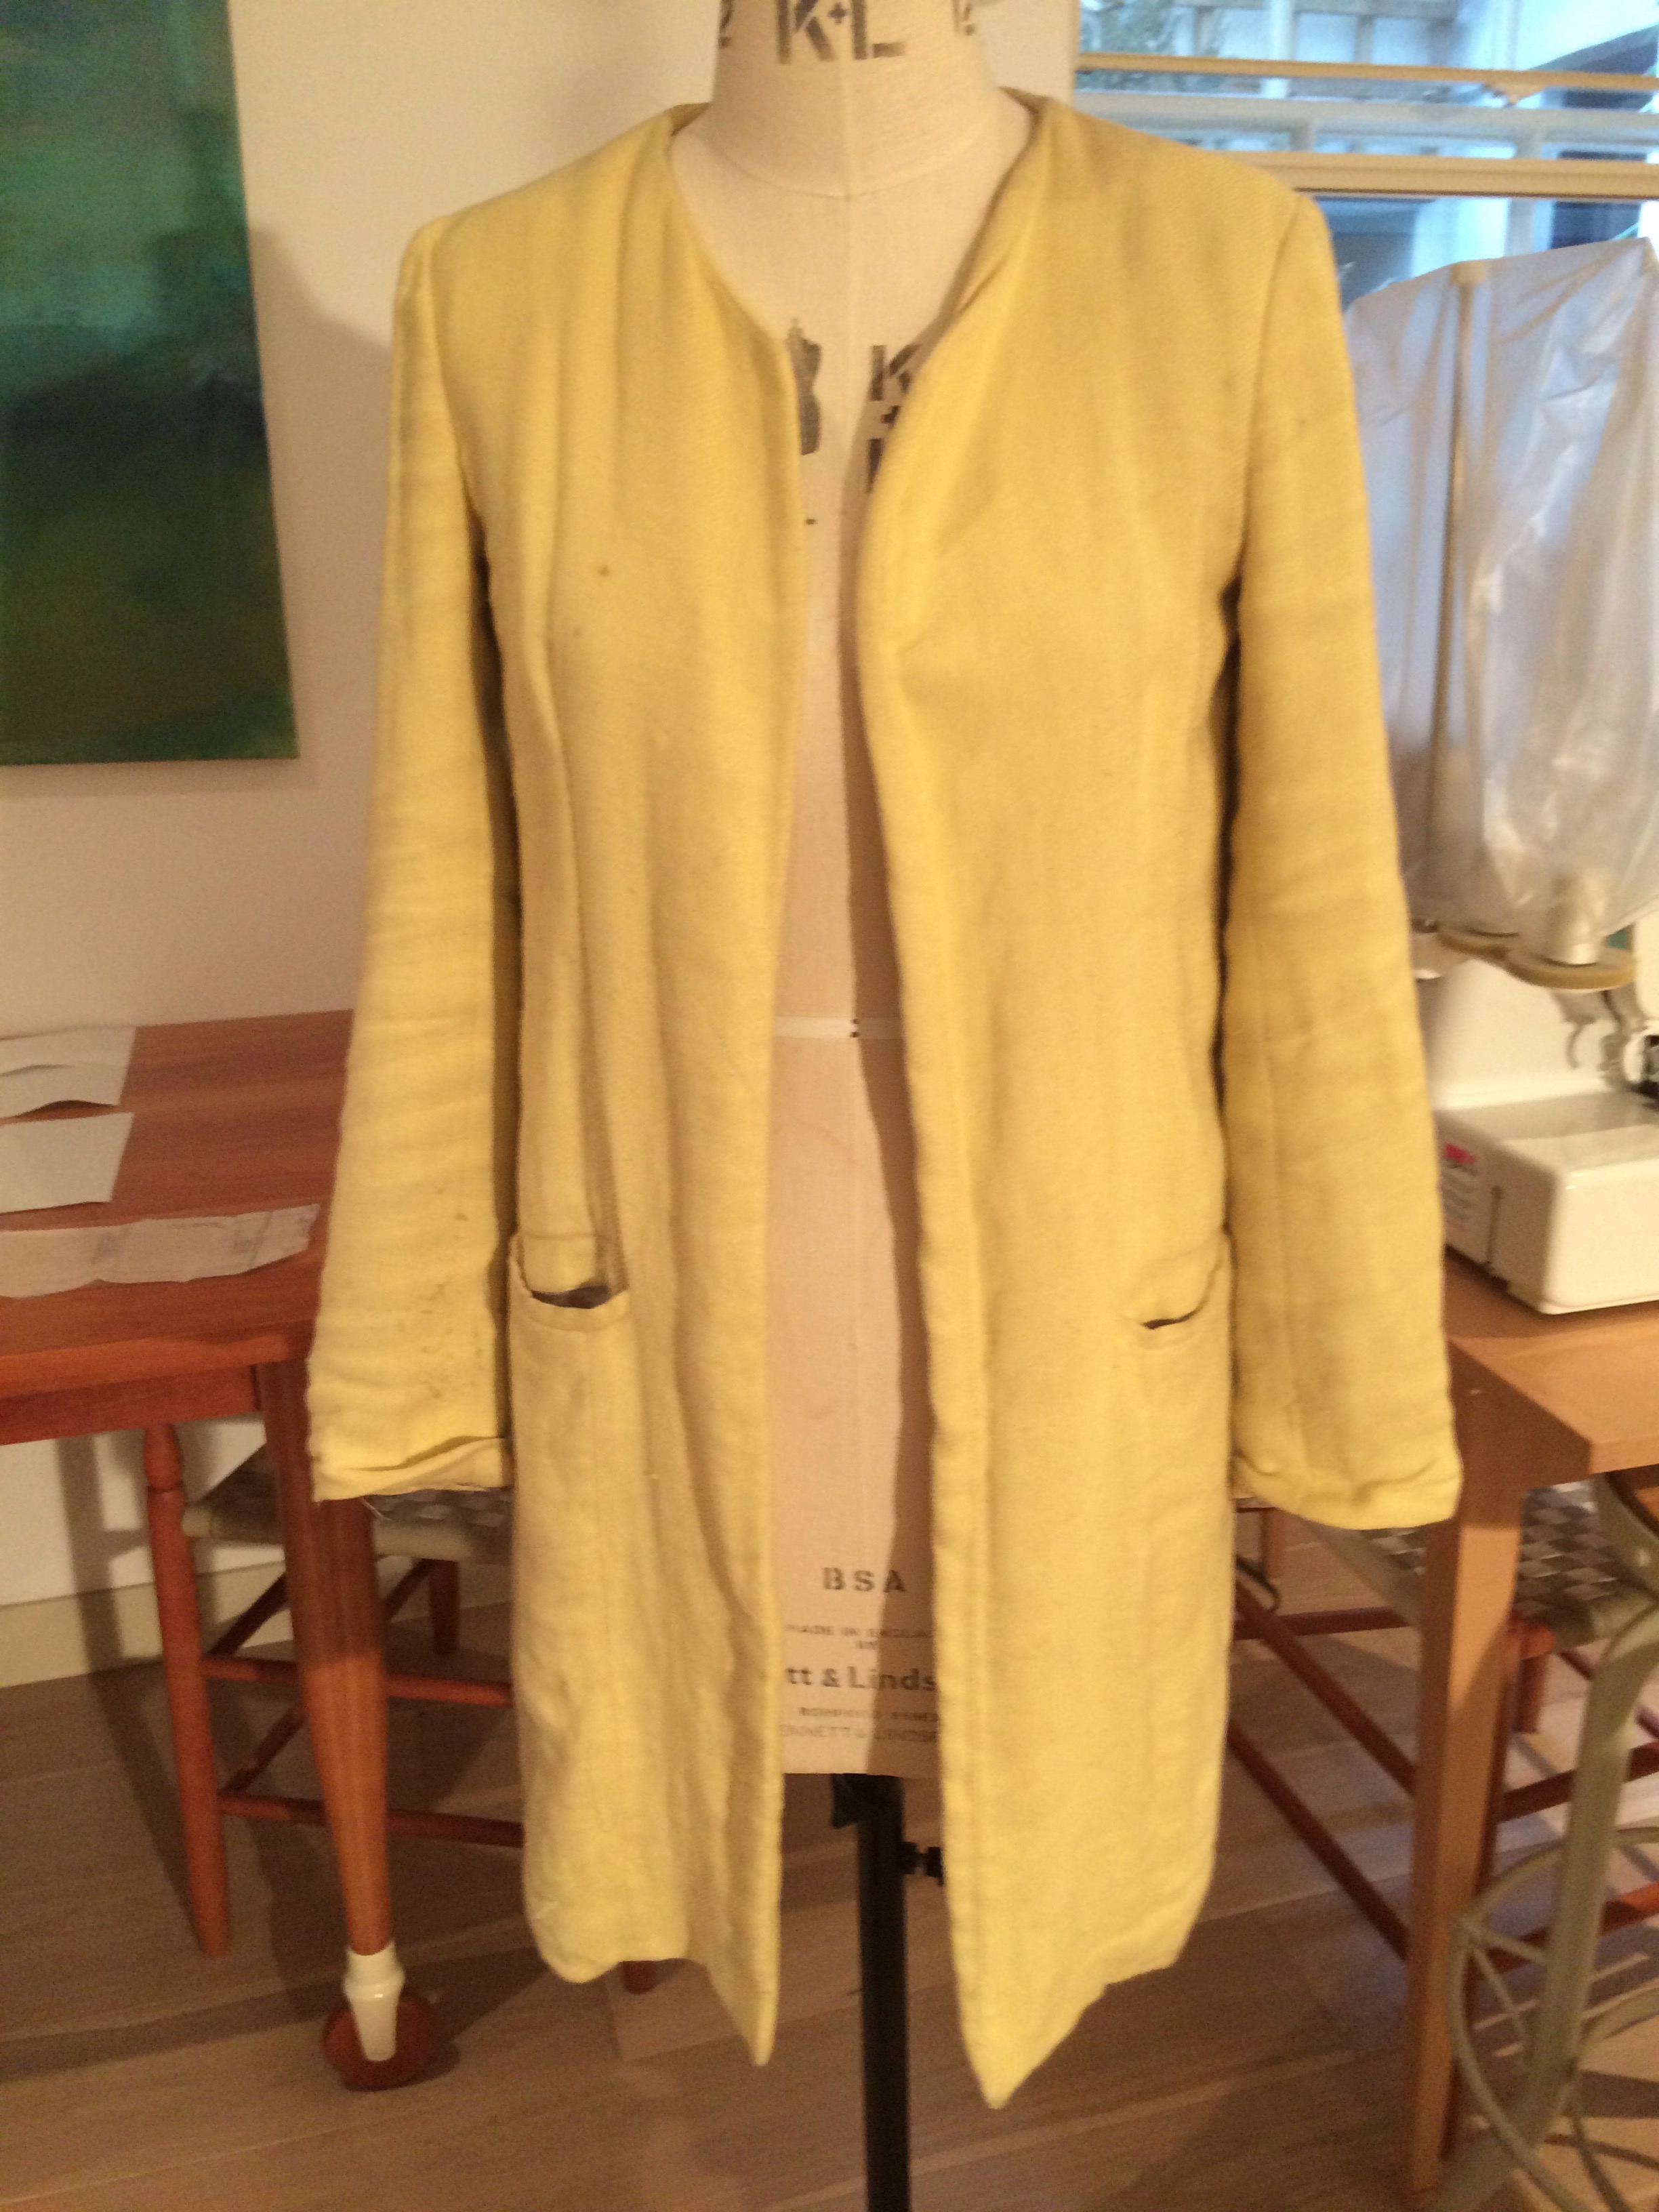
The trouble is, while I have made up a passable pattern, I have not made the coat. All yellows I have found to date, when conferring with Esme, are either the “wrong yellow”, or the “wrong fabric”.
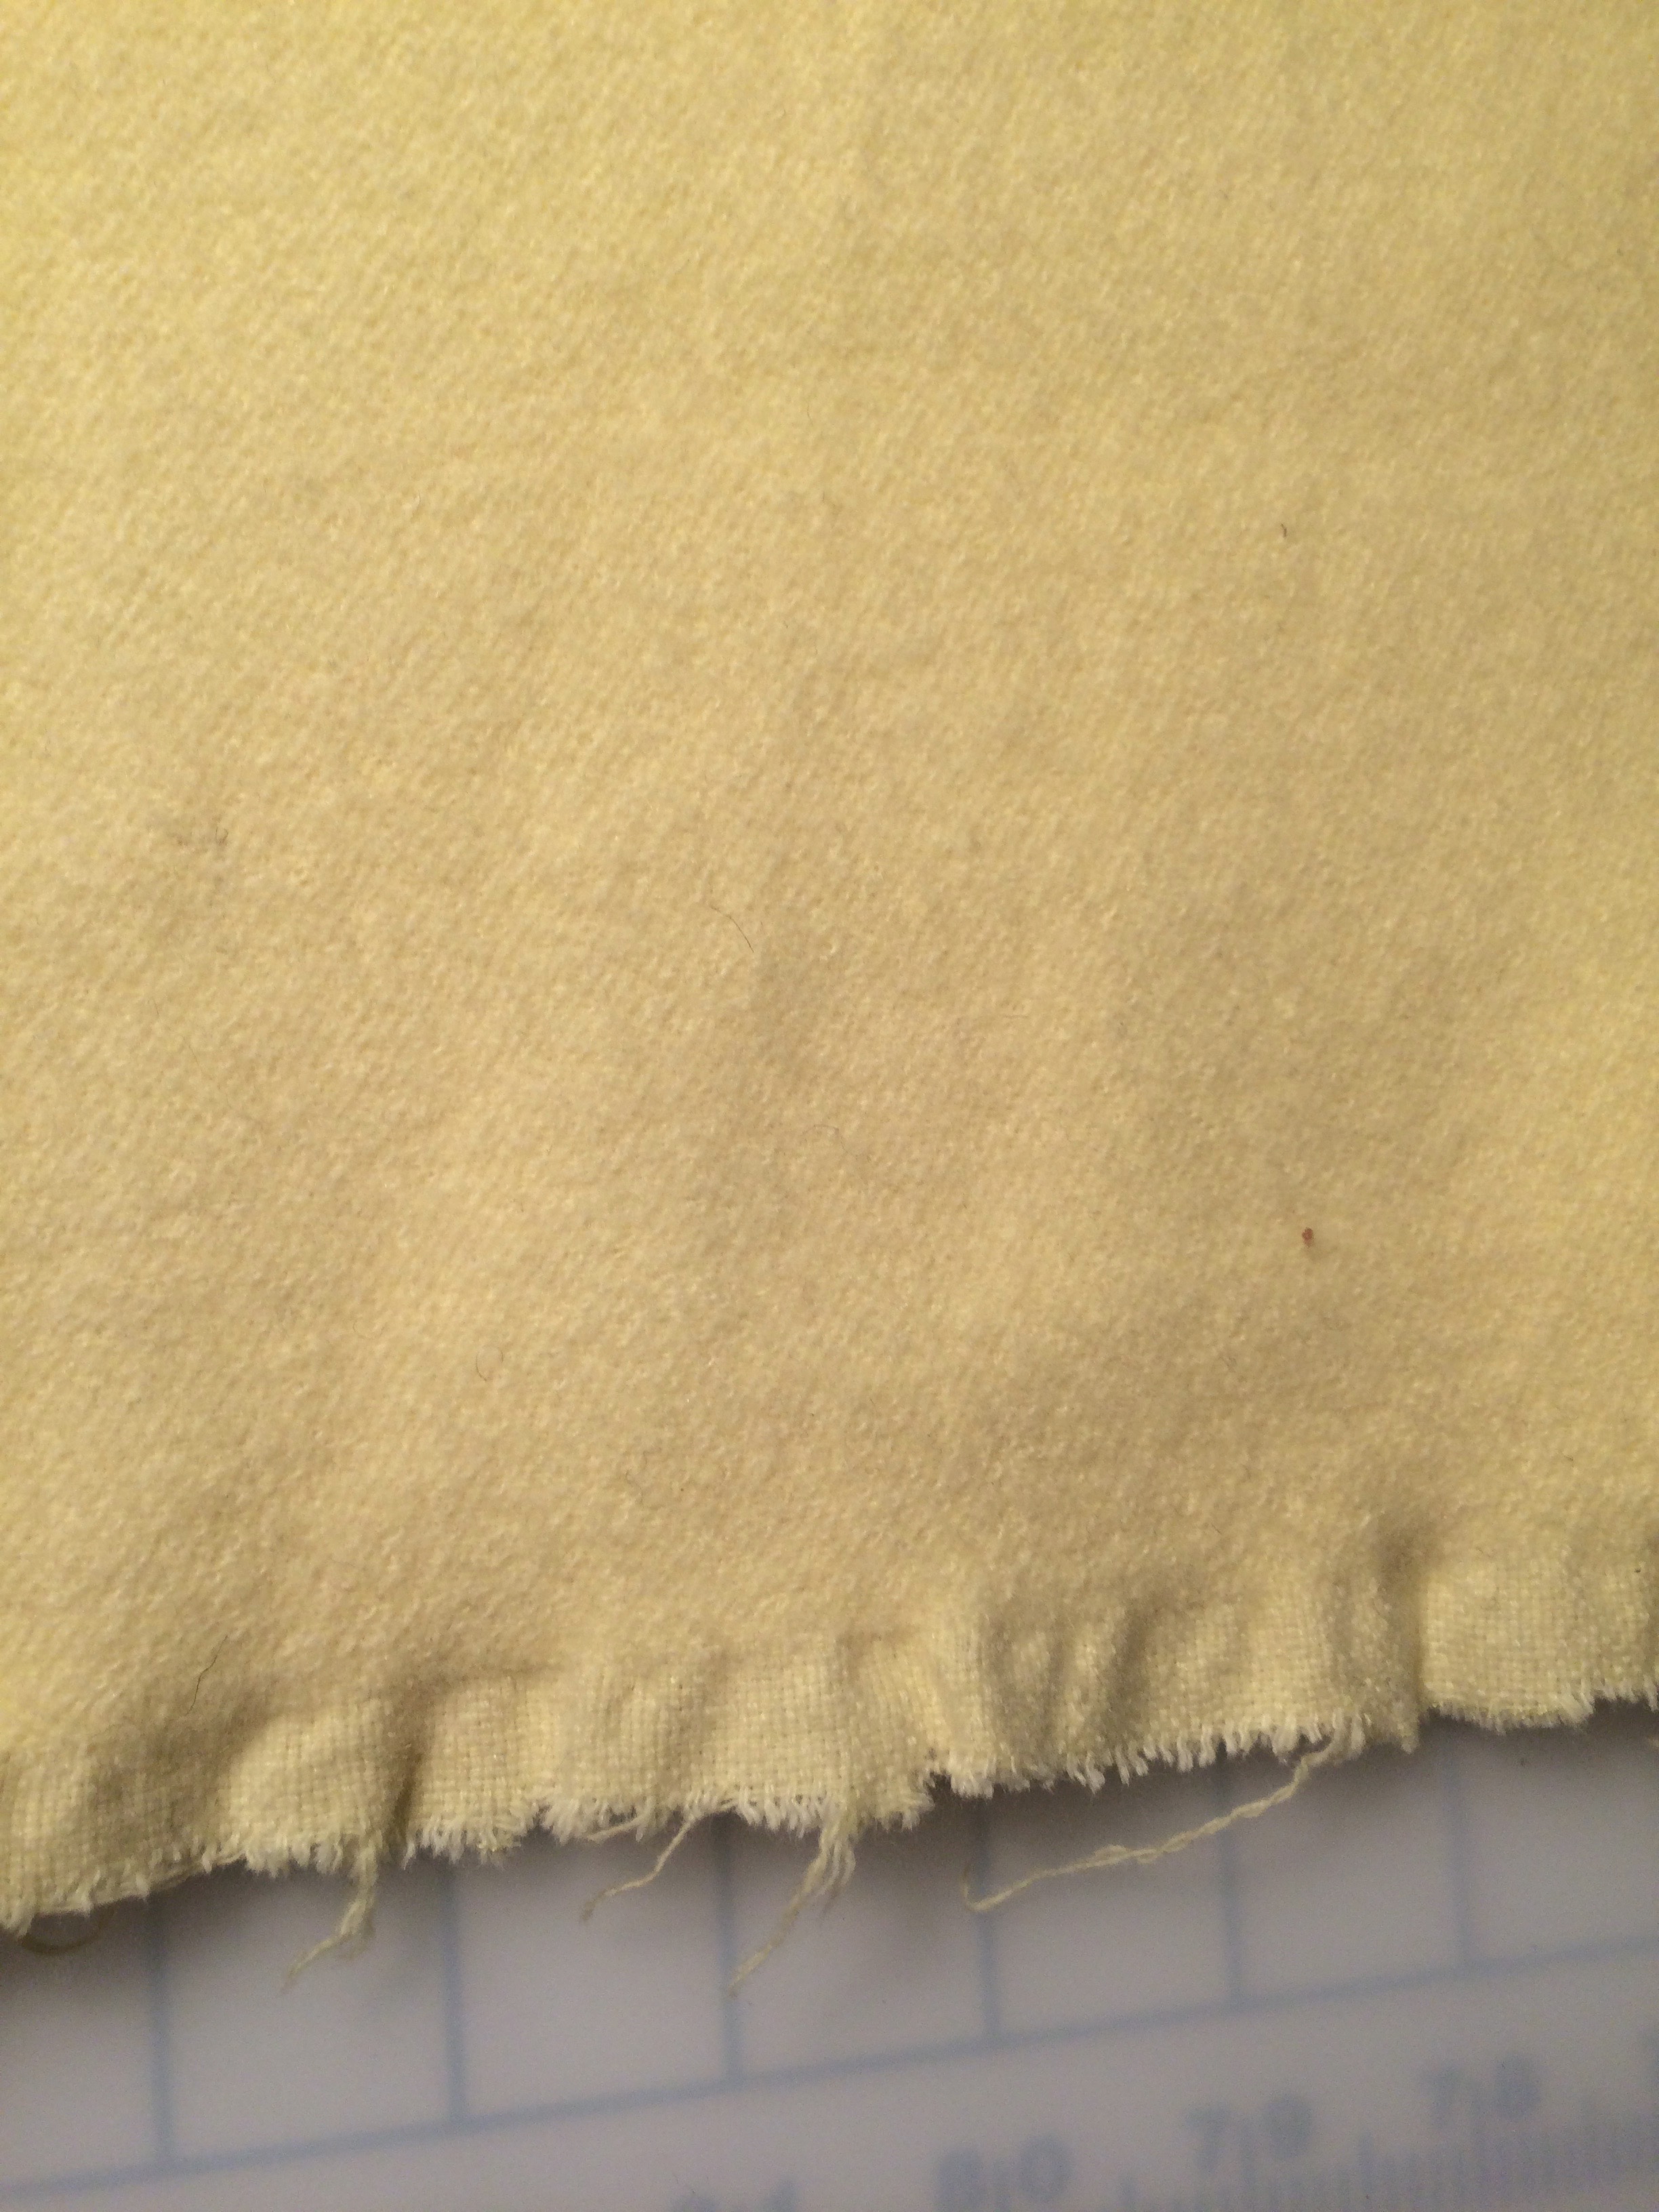
I admit my excitement was barely containable when I found a dusty remnant at Misan fabrics. I knew it wasn’t exactly the right yellow, but I fell for its softness – it includes cashmere – so I bought it anyway. This piece was a funny shape (remember the dress with the hole, from the same establishment?) and dirty from being the end of the roll, so a good discount was achieved. It had a delicate wash, a careful dry and a gentle press. I offered it to Esme but she didn’t warm to it – the yellow is too soft. I know what she means – it does look like a babies’ blanket, if I am honest.
That left me with the opportunity to make something for myself. “Make something in yellow” is one of my projects for the second half of the year so, when I was Kondo-ing my patterns I had a look for a suitable jacket.
What about this 1967 Vogue 7133 pattern? A nice simple cardigan jacket with the added twist of kimono sleeves, no buttons and a little bit of top stitching. I think a yellow jacket that just slips on to give an additional layer in summer is just what I need. Lemon yellow goes with just about everything I have.
I plan to do the top stitching by hand as I prefer this finish, but I will experiment with an offcut to see what it looks like first. I will underline with silk organza (currently in Simply Fabrics at £5 a metre), use cotton organdie as the interfacing, and lining with silk – maybe painted.

I have already started thinking about making the adorable matching dress (and chain belt) too, but not in yellow wool. I previously laid this pattern out on some nice lightweight blue/grey wool, but there wasn’t quite enough of it. Suggestions are welcome. And I actually have a pattern for a hat like that.
This weekend I made a start. It was such a relief to be working from a well cut pattern (as opposed to my own designs which are often a bit shoddy) with wonderful, old style instructions. In the background you can see Nick’s Test Match Hat. It was scorching last weekend. We were luckily enough to watch Jonathan Price in Merchant of Venice at The Globe in the full Sunday afternoon sun. Maybe not the time to be sewing a wooly jacket.


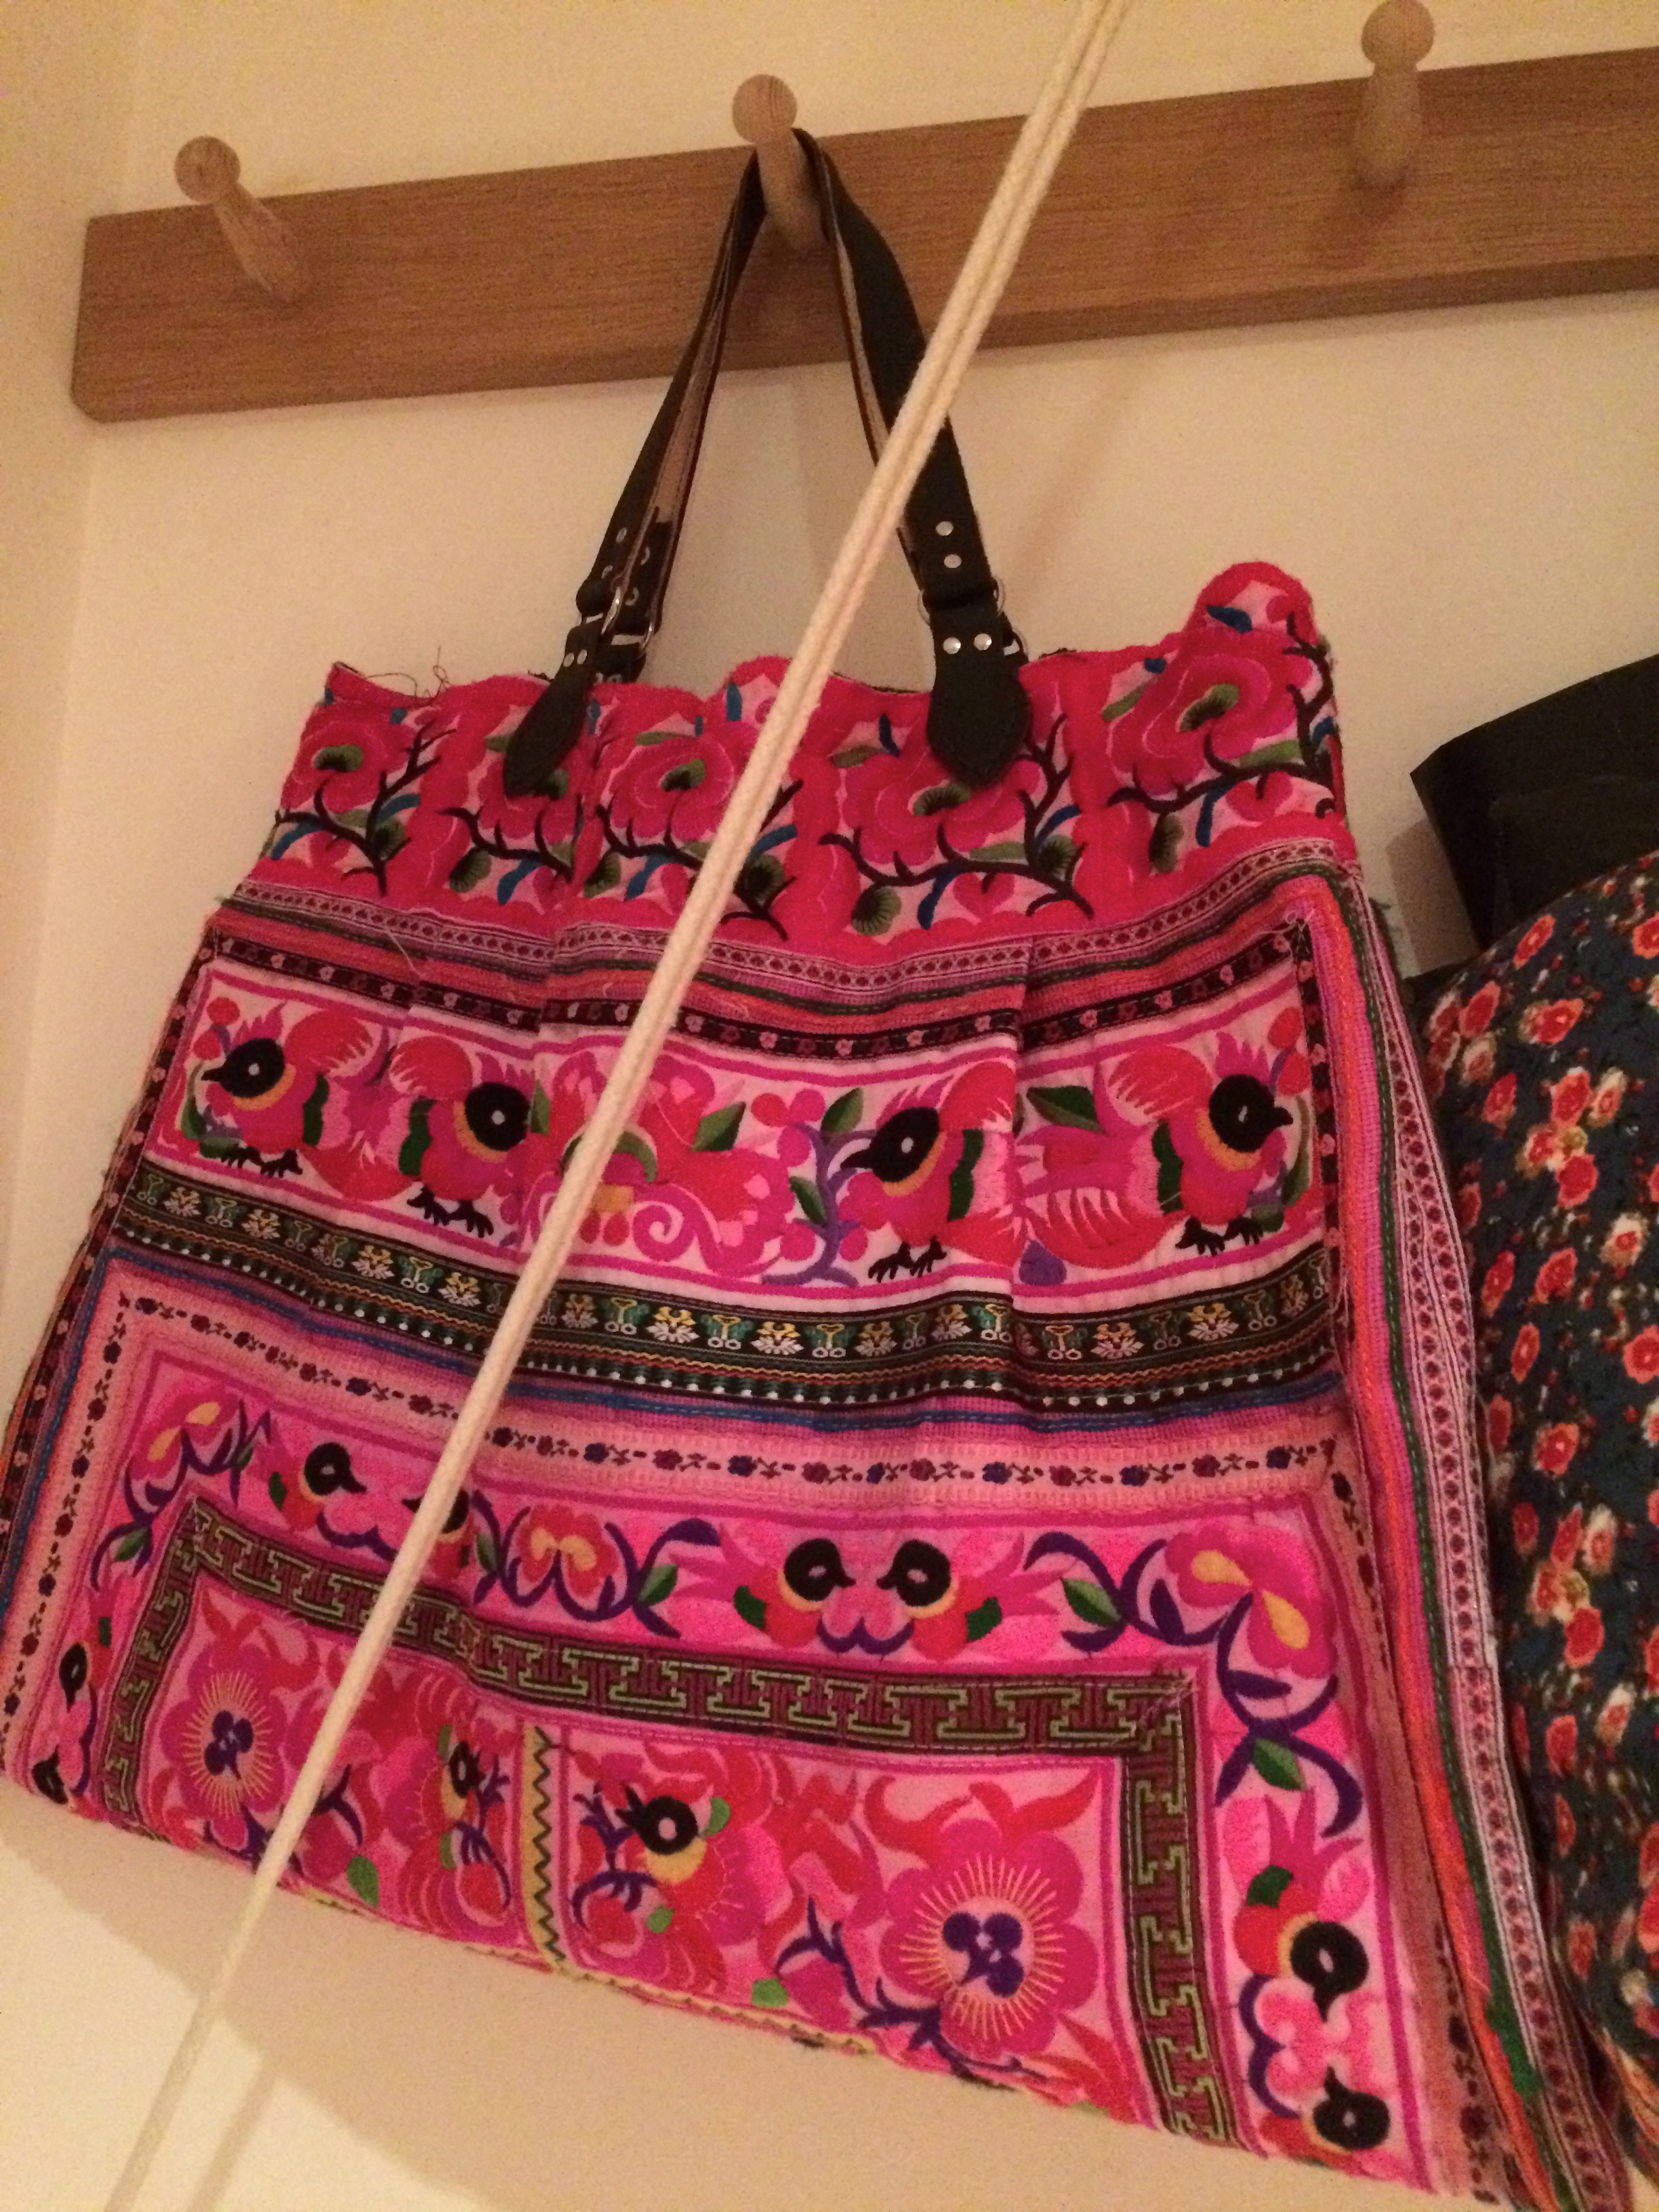
Cambodian Hippy Bag gets an upgrade!
I have this really nice bag made, I think, in Cambodia, which I bought in Birmingham a few years ago. I loved the colours and machine embroidery, but I disliked the long hippy shoulder bag handle. It was made out of some plaited black cotton, with organge, green and black pom poms. So I detached the straps and thought about how I could turn it into a hand bag.

I knew I wanted leather handles but didn’t get much further. Unfortunately this handleless bag was languishing, hanging on one of the Shaker hooks, held up with a nasty blue ribbon. So, as I Kondoed madly, I held the bag and decided it very definitely “sparked joy” in me. But it was useless without handles.
I searched the internet and found just what I wanted. Nicely made, robust, leather handles, in a very wide range of colours, made in England by Simple Way. I wanted dark brown and I wanted silver rivets. As it is hard to gauge colours on the internet I spoke to the company who said that they had “distressed brown” (which doesn’t sound very nice does it? Maybe I should have asked for “happy pink” or “lively blue” instead) and sent me a little swatch and brochure (no charge). The colour was perfect so I ordered the straps (which are fairly expensive at £21, but they are hand made, specifically for each customer, and I asked for a pig skin lining. They arrived nicely packed with a thin bodkin (needle) and some dark brown, waxed thread – plenty of it.

I snipped off the old handle pieces, and put the new handles just to the inside so that I didn’t have too many thicknesses to go through.
Despite there being loads of paper work, there were no sewing instructions, so I assumed it was just a matter of doing a running stitch, and then going back over the same holes, but filling in the gaps.

Anyway the upshot is that I now have a bag I love, that is big enough to take all my evening class equipment, and looks nice with everything, but especially with boring dark clothes. And it looks pretty, hanging in the hall way, on the Shaker pegs. I am not embarrassed about it anymore. I love the new handles – they feel and smell really nice.
Making a pattern for the Futuristic dress (with help from DaughterFish)
Did you know, that according to Ahmed, the Egyptian guide, there are 126 pyramids in Egypt? Amazing, isn’t it? Here I am (looking somewhat Princess Diana-ish) at the Great Pyramids of Giza, near Cairo. One of the few remaining “Seven wonders of the World”. Seeing them on my recent visit (our third visit, but my first sight of a Pyramid) was a moving and very exciting experience. We were also able to go inside (for about £20) and walk up to close to the summit.

At some of the sites there were photographs, in B&W, of the pyramids from the air (they were after all built to ensure the dead were as close as possible to the sun). I loved the play of the shadows and it made me think, again, of the shapes that could be used in a dress.

I remembered the Pyramid dress from Sandra Erikson. I have always found this an interesting pattern – perhaps less to wear and more to have some fun with. There are a few pictures on the internet.

The basic idea of a four triangle shapes is appealing and many dresses, especially longer ones, have this silhouette. The McCardell 1945 Futuristic (also known as Monastic) dress is made up in this way, as elaborated very effectively by fellow blogger DaughterFish. The instructions for making the pattern are on her blog, and it is very easy to follow her instructions. I even found my geometry coming back as I worked out the angles required.

Having cracked the pattern, with my measurements, in half an hour I was about to cut out the pieces, when I realised just how much fabric was required – around five metres! As a normal sleeveless dress would take just two metres, this would be like wearing two and a half dresses at once. Maybe not the most flattering look unless you are very tall and slim. Apart from not having 5m of anything (since I Kondoed out an African funeral print, ahem), I thought this dress absolutely needed a fabric with the right sort of drape. I am thinking that a crepe backed silk satin would be superb – but very pricey. This is the sort of project I will do for fun if I come across the right piece of cloth.

Kondo 0.7 – where I tackle my sewing patterns
The problem as it presents itself
I knew this was going to be difficult. I have lots of patterns – over 100, and then maybe 40 self drafted ones too. Some are old and “valuable”, some are new and never used. Many I got for £1 or so on eBay. However my patterns, just like my fabrics, are pretty important to me. Maybe they even get into the “sentimental” category. They represent quite alot of thought. They bring me joy. Some are rather beautiful. Many are nearly as old as I am, and some are older than me. They smell a bit funny; they have a history; they tell a story. Therefore I have been avoiding this job for weeks.
Here they all are, pulled down and placed on the floor.

Kondo’s advice
What does Kondo tell us about sentimental items?
She says they are the most difficult, so leave them until the end. I guess I am getting to the end of sorting out my home (and office), so I have finally to face this.
I have some genuinely sentimental items. A card my mother sent me when I got my job saying some lovely things. The funeral Order of Service from when my brother died. Photos from weddings and christenings of family members, and lots from when the children were babies. A letter to my father about some boots from the war. A couple of very genuine Mothers’ day, or birthday cards, mainly from my children (when they say thank you, it means so much). I will hang on to these consciously and store them in a special place. Vintage patterns and books are not in the same category. But….
Kondo also has a strong view on “storage solutions”. I agree with her that these items (think Ikea, Lakeland, Muji – boxes, cartons, things that live under the bed) are such an attractive notion, but are actually excuse for hoarding! You put your items n the storage solution and feel in control. But it is not true! I have nearly all my patterns in storage solutions, designed or purchased by my husband (who is a little bit of a hoarder himself, if I tell the truth). I guess he was feeling overwhelmed by the patterns and wanted them to look tidy.
So here Nick’s storage solution. He ordered matching wooden “magazine boxes” on-line and assembled them. They normally live on the top of the cupboard, where they are slightly out of sight. I have to use a step ladder to reach them. I can often, but not always, find what I want because I have labelled them fairly well eg 1950s coats, Menswear, Lingerie, DVF, etc. In fact I always slightly surprise myself when I retrieve exactly what I want. But I managed to misplace the pattern for Gus’s jacket for about a year, meaning I couldn’t line and complete it.
I decided to stick with this method of storage because I just don’t have another one available.
I found one box labelled “won’t fit back in the packet”. This is one of my bugbears. If I make alterations, introducing strips of paper to lengthen or enlarge a pattern, it is often impossible to get the pattern back into the packet. These, after all, are my TNT patterns that I have altered to fit, generally rely on and will go back to. What do you do about this problem? I have been known to remove all the alterations and stick the pattern back together, but that seems stupid. Generally I shove what I can into the envelope, making it look like an ice-cream cornet, plus any overspill, into a large white envelope on to which I write a brief description (“1950s SWAP coat”, in this case). Not very pretty and not that good for immediate identification. Also in time the original pattern envelope splits. A better solution (for my more valuable patterns) is to put the pattern envelope, and the pieces separately into a clear plastic envelope with a press stud or zip (another “storage solution”).


Discarding
Discarding is the key part of the Kondo process and I am pleased I made progress. All those Sew Today magazines (I took out a subscription to buy modern patterns more cheaply, thought some of the articles looked interesting, but I can get similar stuff on the internet if I want to produce an embellished Peter Pan collar, for example.) I also discarded a few patterns I will never use – 1960s pinafore for a 12-year-old girl (I have one female grandchild, but she is two. What is the chance of Maia wanting such an item in 10 years, and what is the chance that I will actually feel motivated to make it? This maybe a more difficult calculation than the recent GCSE puzzle of Hannah and the orange M&Ms). I chucked out the messy, self drafted patterns that didn’t work. I also discarded
- 1970s double-breasted jacket (DB doesn’t suit me)
- modern Buttrick trousers
- a poofy-skirted 1950s dress that I made up and found it made my hips look huge
- A Betty Draper suit, size 18, and more….

Classification
Obviously libraries use a classification system in order to ensure that anyone can find a particular book. I need a classification system for my patterns, and this has troubled me. Patterns can be defined by a range of issues eg.
- Date
- Designer
- Pattern Company
- Item type eg shorts
In the end I adopted a hybrid approach.
I have two broad categories – Vintage and Modern. Modern includes all the new patterns (post 1980s), self drafted, etc. These are broadly broken down by item type, designer (DVF, Geoffrey Beene) or pattern company. These live on the top of my cupboard. Vintage patterns are arranged basically by date, subdivided by item type. However a few are arranged by pattern company – I have about 15 Vogue Pattern Originals, and a few similar patterns from other ears. These are the “valuable” patterns in my collection that I treat with a bit more respect, so I have segregated them. My boxes have pencil descriptions on them – tellingly provisional, as if the collection would keep expanding. I decided today that I don’t need any more patterns. Consequently I committed to the categories by using a black felt tip to write on the boxes.

Final reflection
When I Kondoed my fabric collection, I concluded that I had bought enough. When I Kondoed my dressmaking patterns, I felt the same. There are enough here to last a life time. Most dress, coat, trouser etc styles that suit me are represented here. I have lots of suit patterns, lots from the 1960s and 1970s, especially dresses. I can say that I would wear every pattern I have (I kept three maternity patterns in case of further grandbabies).
However I could discard all my patterns. It wouldn’t stop me sewing. Maybe it would be refreshing to start each project anew. Buying, downloading or even drafting a pattern is not the most difficult thing in the world. The downloading approach is quite handy. I already feel free to discard my Burdas as they can be downloaded again, free of charge. In fact in my ideal world all patterns would be digital, especially if we could find an easy way of saving alterations. I own very few novels precisely because I can always down load one or buy second hand on Amazon. Personally I look forward to the day when dress making patterns are all downloadable.
Using my knife print fabric
Last term I printed a piece of cloth with a knife print. I have written about this before. On top of a light grey background I over-printed with small knives lino blocks, using navy, darker grey and a little bit of red. Eventually I finished the fabric left it to dry, then fixed the colour with a hot iron. “Make an outfit with the knife print” was one of the items on my to do list.
The issue when printing fabric in general is how much to make. More often I decide on the garment first, then print or paint the fabric, ideally having cut out or at least traced off the pieces. This saves painting or printing the parts that are wasted. However with a specific length of cloth (2m) I was restricted in what I could make. I considered a summer skirt, but when I draped the fabric on me I thought I would prefer a dress. I considered a fitted dress, but then rejected it on the grounds that I didn’t want to spoil the design with darts.
When Esme was pregnant I had made up a simple flared dress pattern for her. The idea was that in a wool it would be a pinafore dress, whereas in cotton it would be more summery. I made a winter dress for her and I think she wore it for work before her bump got too big. Anyway it isn’t a maternity dress as such – simply one that flares from the shoulder – and I thought it might work as a simple summer dress for me. It is such a simple pattern – just a front and back, no darts, no fastenings, just an easy to make and wear dress.
With self printed fabrics accidents can happen. As I was mixing the printing ink I managed to drop some blue on the fabric. I scraped it off and washed it out, but it was too late. Luckily it didn’t matter when I cut out the dress.

I used every centimetre of my cloth to cut out the dress and pinned it onto Camilla. She does look a bit expectant, doesn’t she?
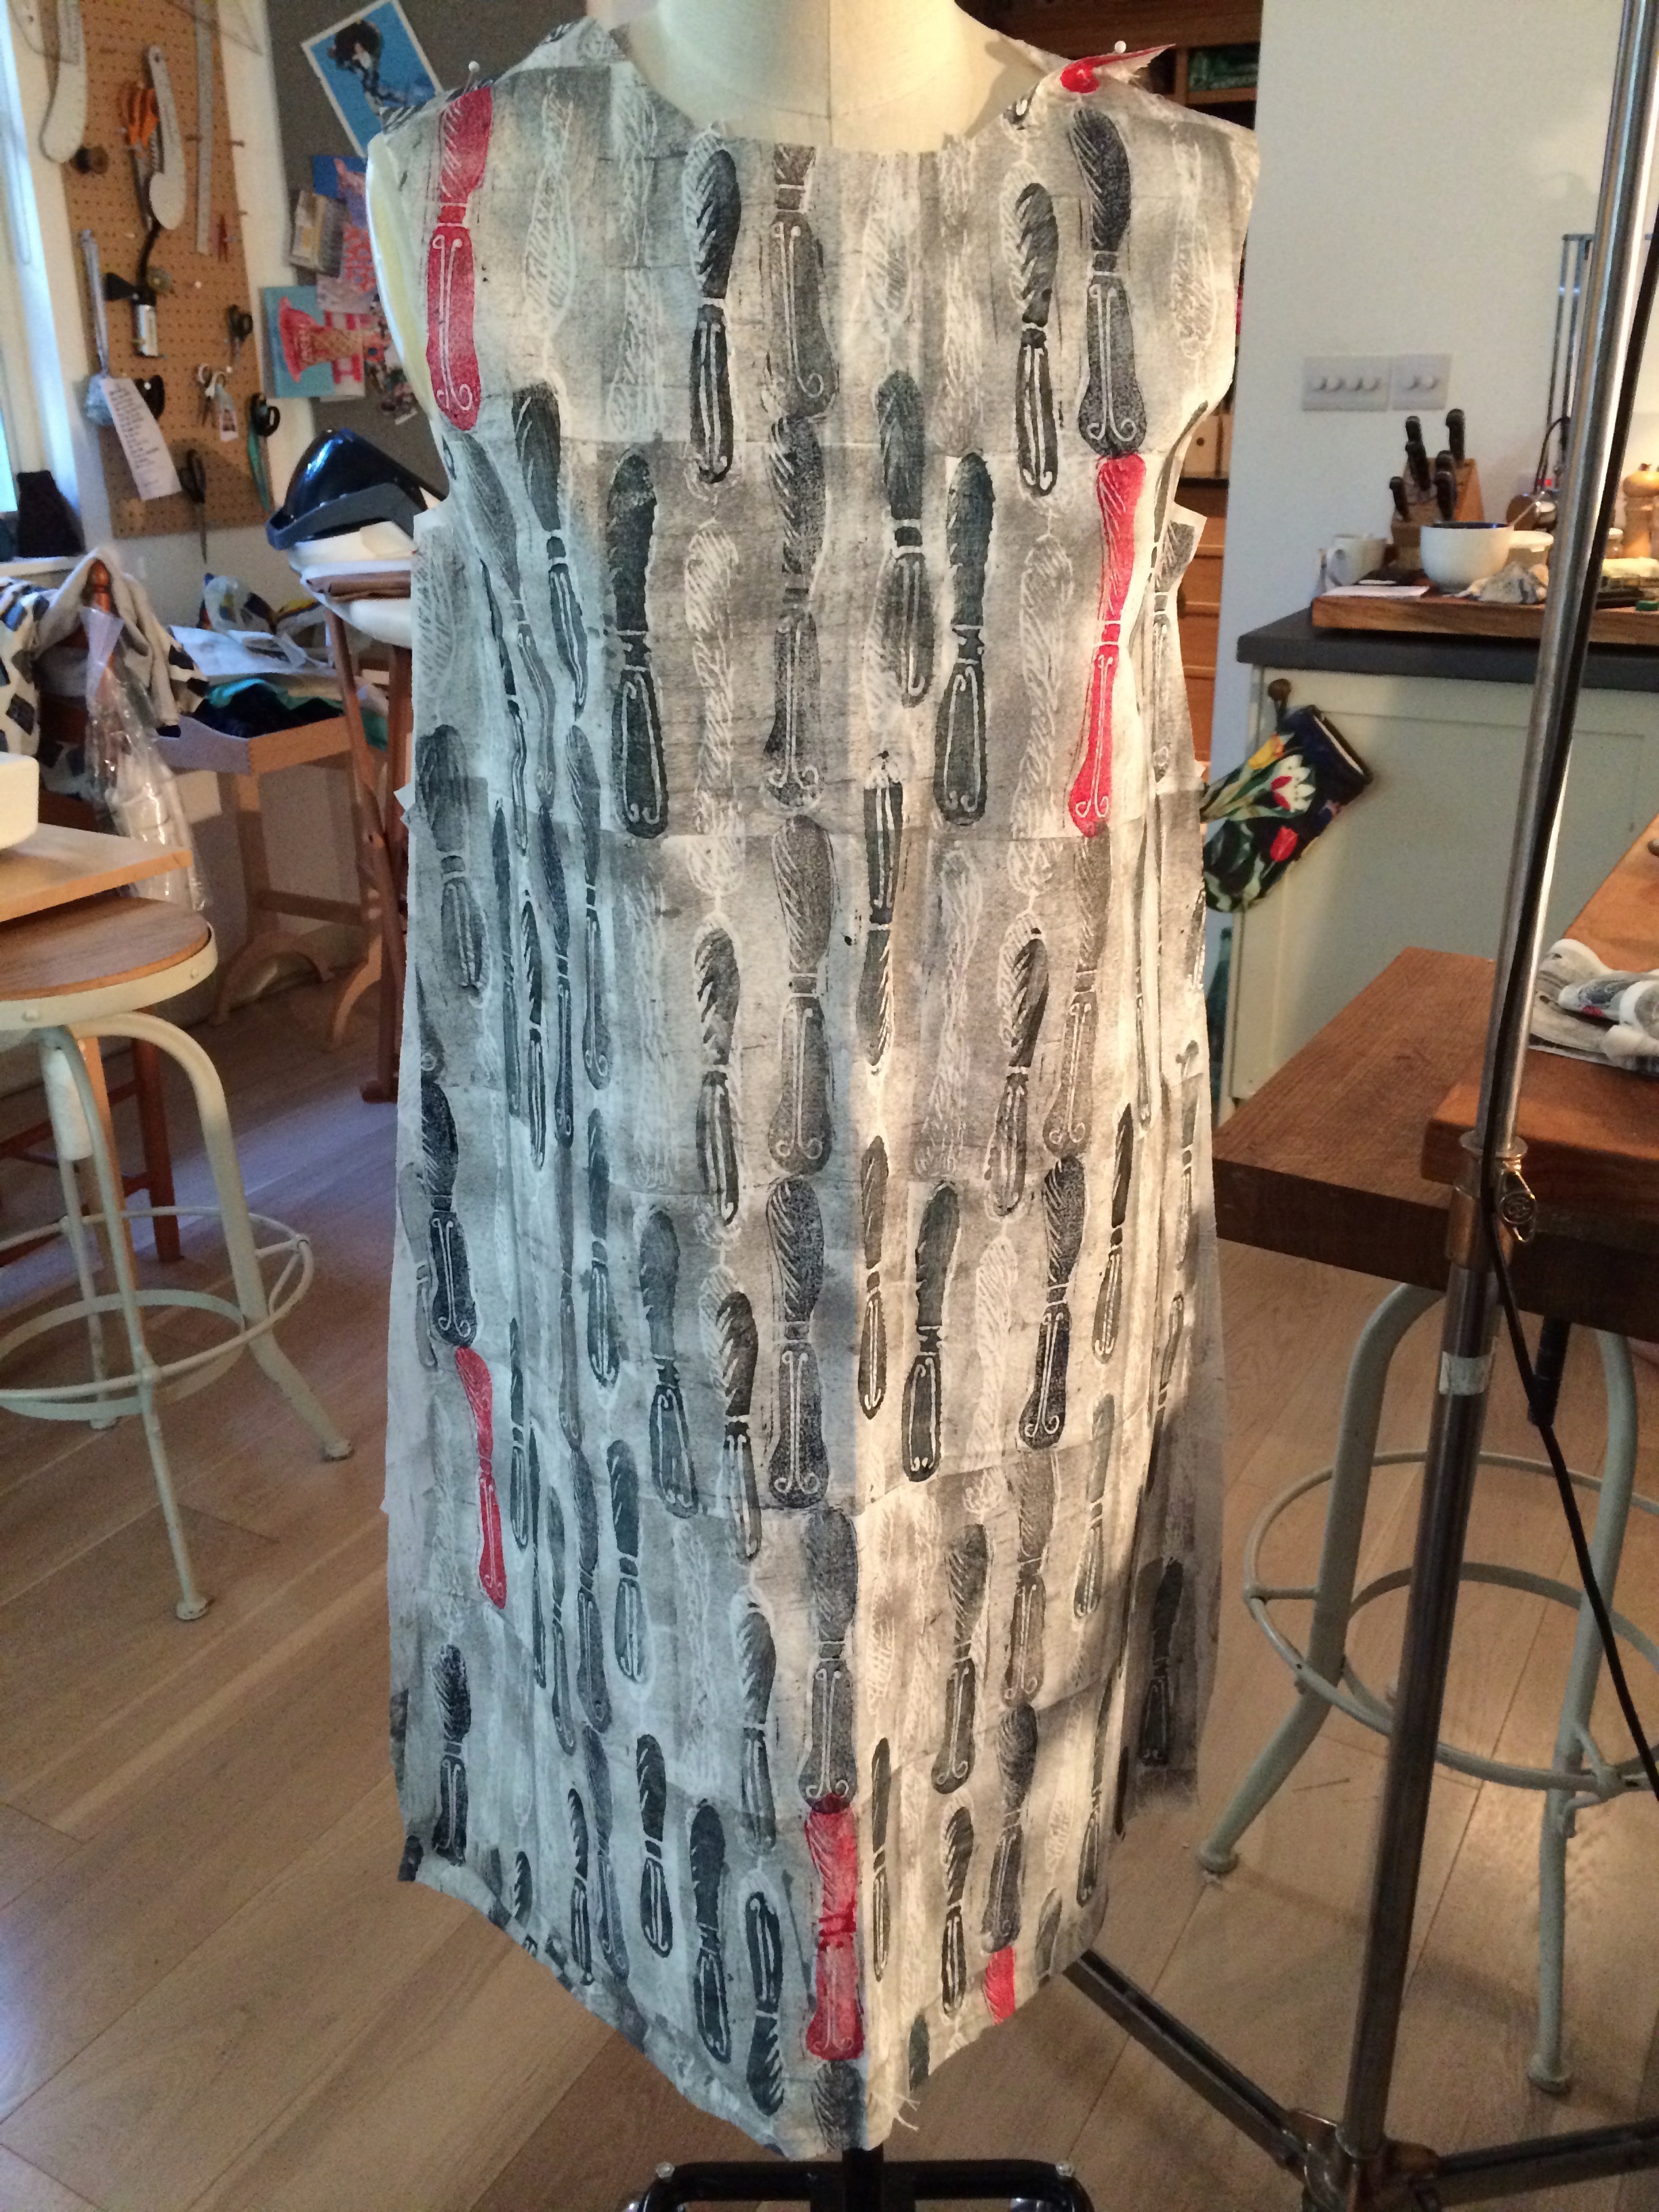
Now I have to decide whether to line the dress, create facings or make some bias binding. I don’t think it is worth lining it as it is a little bit too firm for the design, and I don’t have enough fabric left for facings – of course they would be fine in white cotton. I do have a little bit of red linen which might work well as bias binding. I also have a few off cuts of the knife printed fabric which I would like to find a use for – perhaps pockets (mainly to distract from the paunchy look), or a little bag? I will have a think about how to proceed. I don’t want it to look too much like an overall (for a pregnant cleaner). Any views?
Wearing Muslim dress
Recently we had a chance to visit Cairo’s Al-Azhar mosque.

Despite visiting many countries where Islam is the primary religion I have never had the chance to actually see inside a mosque at prayer time. It was a fascinating insight. The wide open spaces, both outside and inside, feel airy and spacious and were full of local men, some talking, some reading, a few lying down for a rest, some praying, and several on laptops or tablets (of the modern variety).

We stood inside the mosque as the call to prayer was made – even in Arabic it had a profound, and moving effect on us. The ancient structures were beautiful and we were respectful and tolerated.
But to get in we had to dress up according to Koranic prescription. This photograph of four of us – from Marie from Derbyshire, Bev from Tyneside, me, and Jay from Toronto, all turned up with our headscarves and trousers on. But the lady at the door felt our trousers were too short, or too fitted, so she loaned us three shapeless skirts in black, grey and red. This is what an elasticated waist, full length skirt looks like – the idea, in a way, was to look as unappealing as possible, and I think we managed that quite well. I enjoy wearing “other people’s clothes” as I believe it gives a tiny insight into what another culture is like. Over the years I have managed to wear saris, African dress, shalwar kameez, Iranian chador, Tibetan coat, a Kimono, and now this.

Our heads and bodies were covered, but of course there are more than one way to achieve the correct look, and living in London I see many variations of covered hair and body. I try to guess the country of origin according to the style adopted. Some of our London girls really pile their hijabs high, making them look very elegant. By the way if you want to understand the terminology, this short guide may help.


If White British, broadly Christian, women were Muslim how would they dress? Perhaps with our baggy raincoats and a headscarf we could comply rather well.

Draping on the stand 0.1 – how I got started
Previously, as part of my City and Guilds in Fashion Design, I did one term of draping on the stand. I made a seamless coat (apart from the inset sleeves). I have always thought I would like to know more so this term I signed up for classes at Morley college to learn more. Taught by New Yorker Linde Kinne we have been kept busy and have achieved high standards, despite the less than ideal mannequins we have been working with – how I long to get started on Camilla at home!
To be honest the course has been quite hard work after a long day at the office, but after five weeks I have got a draped dress toile completed. Here is how I got started.
After taping the stands at the waist, hip and shoulder we blocked our calico to make sure the grain was perfectly aligned. Then we put some guidelines on to the calico – a CF line, a bust line off it at right angles and the same with the waist and hips. The darting was fun to do – although we were aiming for one underarm and two waist darts my model only really needed one. Once the pinning was achieved (in a specific way) the neck line and armhole were drawn in.

Then we moved on to the back. To be honest I found the process very slow and boring. Obviously there were different levels of experience in the class but I didn’t really see the point of creating a torso block which I could do to my own measurements with flat pattern cutting (paper and pencil). After five weeks, allowing for induction, paper work and fire drills I had the dress pattern completed. Although my stand was not exactly the right shape for me I added a little curving at the hip and managed to produce something that roughly fits. This means I could use this pattern to create a summer dress. However, as you can see from the clock, it was only 7.30, so there was time to move on to the next project. Hurrah!

We have been asked to design a flared or tent dress, with a yoke, and then model it on the stand. Exciting! I was relieved to be going on from the basic pattern to actually draping, and set to work with gusto. I wondered if I might be able to do a version of the Claire McCardell monastic dress, which I wrote about before. Here are three versions of the Monastic or Future dress. I don’t intend to recreate the dress exactly as DaughterFish has, quite brilliantly, done. My brief, which includes a yoke, precludes this exact design. But I will be using it for inspiration (and I have fabric that I think will be suitable). Stay tuned.


I hope that once the course ends I will be able to teach myself some more about draping using a book. I have bought Draping, The Complete Course, by Karolyn Kiisel. Anyone used it? Any experiences of draping?
You must be logged in to post a comment.