It is Christmas Day. We were supposed to be in Lancashire eating Christmas Lunch with my Mum. Unfortunately she fell in the night and dislocated her hip. She is spending Christmas Day in Royal Blackburn Hospital, poor thing.
Kit and Great Grandmama
She is on the mend and we hope she can come home in a few days. I sincerely hope your Christmas is less eventful than ours and that you are getting some rest and peace.
Here is some festive lining I made earlier.
Hand painted silk lining
However if you are stuffed, bored, or sleepy here is a little bit of post lunch fun.
Christmas Eve already! I can’t believe how quickly December has whizzed by. We are up early and on our way to Lancashire this morning. So what could be more appropriate than a Red jacket?
Lancaster (then Lancashire) Red Rose
The Red Rose of Lancaster dates from 1485 and, when matched by Henry 111V with the white rose of York, became the Tudor Rose, which is now the symbol of England.
“Pink” hunting jacket
The Red jacket (referred to as a pink jacket) is also the chosen outfit of the Boxing Day hunt, which remains very popular in Lancashire. The issue of hunting is very contentious but most country people like it for the jobs it creates, their fondness for the horses and hounds, and the fact that following, on foot, is a good way to use up calories after an indulgent Christmas.
I managed to finish my “wearable toile”. The brooch, incidentally, is made with four small pom poms in maroon, orange, dark green and navy.
1950s jacket
Unfortunately it is a big disappointment. I will take it with me, and I will wear it when we go out tonight to one of the best pub restaurants I have ever been to. In my Mother’s tiny village of Wiswell lies the Freemason’s Arms. It serves wonderful food and Christmas Eve will be very special.
I have not enjoyed making this jacket. And the problem was not the one I had anticipated. I thought shaping would be the real challenge, given the fitted nature of the garment and the fact that it was a small (32″ bust) pattern that would need alteration. The actual problem really came down to the fact that the fabric was not suitable for the job.
I bought the toile fabric it because it was obviously a “wooly” type fabric designed for a skirt, jacket or winter dress, I liked the colour and it was inexpensive (£4 a metre – barely more than calico). And of course it is possible to tailor in fabrics other than wool. My SWAP last year used a blue linen, and a pink cotton for the jackets, and my Chanel style jacket tweed is a wool-free mixed fibre (which would not shrink). But I had not used polyester/nylon before and I will not do so again. It doesn’t tailor well, mainly because it does not respond to pressing in the same way as a natural fibre.
With a classic wool (or wool with a bit of something else in it) you can use the iron, moisture and pressure to make the fabric take up a shape that fits the body. While this is not the case with cotton, linen or silk, they will all stand high heat and can at least be pressed and stitched to create a firm, shaped garment. I found with polyester that it stretches, and it doesn’t like getting too hot. What this meant was although I was able to press all the seams as we went, it kept getting creases in it, that became semi-permanent as I pressed in other areas.
Now we come to the key question. Should I drop this jacket because (according to my family) the style doesn’t suit me? The following feedback has been received.
it’s too Mrs Thatcher
Mrs Thatcher, 1958 (aged 33)
nasty colour on you
don’t like the pockets
comes up too high at the neck
you need to be taller with long legs for a jacket like that
too tight
Simplicity 100 Finished toile
Or, is the style good, it is just that the fabric (being polyester or nylon) shows every flaw, will not lie flat and appears to have been through the washing machine? It has taken hours to get this far, so this is a depressing outcome.
The other problem area was the pocket bags, which are too obvious, as you can see above. I carefully stitched the facings to the seam allowances of jacket and pocket and you can tell this is what I have done. With wool, sweet forgiving wool, these “behind the scenes” activities would be practically invisible. I was in despair so wrote to Mrs Mole. She came back with excellent advice:
“Fingers crossed the toile starts behaving itself and soon you be happy enough with it that you can cut the real thing. Good things take more time. You know that!”.
I think that is the point. I don’t need to be happy with it, just “happy enough” to progress to the real thing. It was always intended as a dry run and trial outfit. It doesn’t have to be good enough to wear. Stop stressing about it, and move on. I feel making the real thing would get me over my disappointment.
However given the strong reaction of both my daughter and husband, and my own doubts about the jacket, I have to decide whether to make this suit – Simplicity 100 – in 100 per cent wool, or to go for a different style. I have at least half a dozen suit patterns that I like as much as this one. But I am keen to hear your views before I make a final decision (please be honest rather than kind).
Galina gave me the pattern for her kimono-style jacket. I had a look at photographs of the original Yamamoto suit (her inspiration) to discover more about the construction techniques and ideal fabric choices.
close up jacket
Observations
main seam (across back and down sleeve) revealed on outside of garment
side seams are enclosed
large gusset at underarm
raw edges throughout apart from the hem
a fairly heavy but soft wool (with substance and drape)
unlined
the long bias cut sleeves will stretch
deep, soft hem gives weight structure
fastened with one large press stud
I have commissioned Galina to make this suit for me. In the meantime I could not wait to experiment with the pattern.
Pattern
Galina gave me a small piece of paper on which she had drawn a scale diagram plus measurements. On a single layer of fabric I cut out the pieces. All seams are on the the straight or cross grain, with right and 45 degree angles. There are two pieces (or three if the collar is joined at CB). I had to join the front and collar piece as I accidentally separated it at the CB seam, but would cut the front in one piece next time.
The pattern requires a gusset, as can be seen from the picture at the top. Galina assumed I could work it out for myself, and I had a try, but I am not sure I got it right. As this is just a first attempt toile the only thing to do is experiment and guess. I don’t know if you have ever put in a gusset, but it is not the easiest thing to do.
Fabric
Of course this jacket is designed for a slightly rustic, textured, soft woolen cloth. I considered various wools including a double faced cloth (navy and cream), a white/blue/brown plaid, a light grey jersey with outsized rib, a gorgeous burnt orange with a nice diagonal weave (absolutely the wrong colour for me), a black and grey version of my squiggle fabric (I don’t suit black).
In the end I found something interesting to work with (quite different from the fabric chosen by the designer).
At Simply Fabrics I found two dozen rolls of narrow width woven pure silks. The pieces appeared to be 164cms long, and just 67cms wide. They have a selvedge on only one edge, implying they are cut down. I have no idea what this fabric is used for – ties? waistcoats? some sort of lining? Anyway at £2 a metre it was cheap and I am always attracted to lustrous, shiny fabrics (although I rarely wear them). I dithered in the shop but got it anyway so I could test the pattern.
Sew2Pro recently mentioned she like working with leather because of the smell. This was the opposite. I imagine that these small rolls of silk have been sitting in a warehouse, or in a musty cupboard somewhere for quite some time, imparting an unpleasant tang. I thought about giving it a wash but such was my impatience that I just went for it. The weave is made up of navy, white and pink, creating an overall look of purple. The underside is quite distinctive with a nice, stripey look created by the long threads being carried across behind the dots. It creates fragility but I thought it might give an interesting contrast to the jacket.
woven silk
Construction
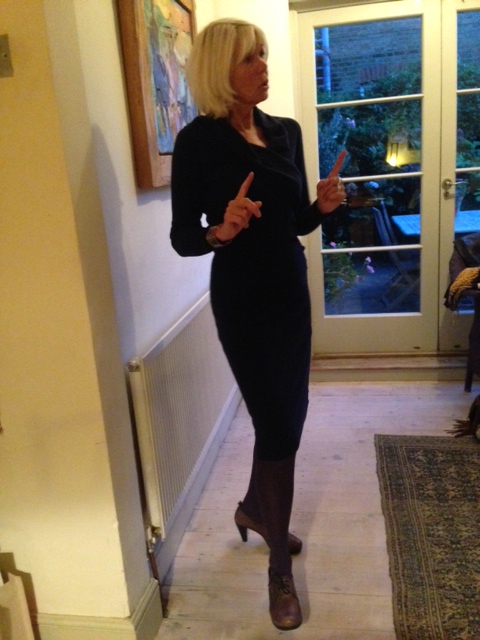
I pinned it together on Camilla.
I then machine basted it on one side and tried it on. It is a thrilling pattern with the back yoke seam contining down the sleeves. It feels a litle as if the waist is around 1″ too high, and the sleeves are way too long for me (I dislike wearing long sleeves, however elegant they look). Of course in this fabric it does look a bit like a smoking jacket or dressing gown.
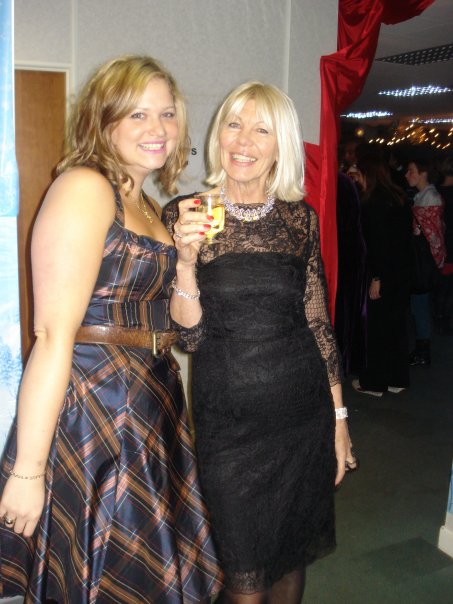
Having tested the fit (which was fine), I stitched it up. I made a wide belt sufficient to circumnavigate me twice, and tied it at the side with a bow. I am off out tonight to friends for drinks and it looks nice with my navy layered skirt. I have put on some perfume (and Galina’s necklace), and hope that I don’t smell like a manky old Macclesfield tie-maker.
Mary was working for Notting Hill Housing Trust when I started more than 10 years ago. She ran our charity shops, volunteering programme and the fund-raising team. More than anyone she embodies the spirit and values of Notting Hill. She also has a real interest in clothes and I am always keen to see what she is wearing. At 5’10’ with a terrific size 10 figure she looks sensational in a black T shirt, but more often wears interesting colours, textures and shapes. Mary had a terrible accident on her bicycle not long ago, but when we talk about clothes she lights up.”Talking like this makes me think of other lives and guess what – beautiful clothes and fashion bring a smile to my face and though my journey has been strange – that wonderful feeling is still there and I feel it’s part of me now.”
Director of Fundraising Mary Harvey
Tell me about your childhood
My childhood was different. I had a very fashionable Mum who did not get married until she was 30. That was pretty late in Ireland in the 1940s. She was working as a Civil Servant in Dublin. When she was single nothing was more important than wearing beautiful clothes and she starved in order to have the latest ball dresses and suits made by a dressmaker. She would often take pictures of Rita Hayworth and Ginger Rogers from the Hollywood films and order a faithful copy! Getting married was a let down for her as she had to move to small rural village. She kept her single woman’s wardrobe and her love of fashion. She produced three small children in rapid succession. When we were 10, 12 and 13 we decided to make her a present to take her when she was in hospital. We took a large pair of scissors to the back of her magnificent three-quarter length ocelot coat, and made her a pair of mittens to keep her warm ! No wonder she cried when she opened her present. She used to make us clothes, and knit rather wonderful matching sweaters and put big bows in our hair which was a bit of a challenge for a tomboy like me.
What about your teenage years?
Ireland of the 50’s and 60’s was deeply conservative and my life there was somewhat suppressed. I actually studied dressmaking as part of my A levels and for the final exam had to make a tweed suit and model it! That’s when I realised there was no place for a young person like me. After you left school you could either go to the university or you had to slowly turn into an old person – follow the tradition and be absorbed by the expectations around you to get married, have kids, look very grown up.
I decided to escape completely and I went to France – and hit Paris in 1968 ! It was so exciting but also confusing – it was not a great time to be Irish as people were not very knowledgeable about “The Troubles”. At that time London was really the fashion capital of the world in terms of the swinging sixties – invention, creativity and young people’s style. Paris, on the other hand, was chic and very expensive and I soon learned that French women were incredibly controlled about how they spent their money. They invested in pieces – it could be as little as one or two a year but it would be a classic piece that would always go with the existing wardrobe. It was very much – navy or black? To be honest I was torn between finding it terribly boring but also being impressed with their discipline and their sense of style. Parisian women would venture to London to have a good look at the fashion trends. They would be excited and shocked by girls with huge eyelashes, wearing tiny little skirts, revealing long legs, wrapped in mad Afghan coats. They saw Londoners as a spectacle, and to some extent envied their freedom. But at the end of the day they still felt superior and safe with their “classic” look. On the other hand Parisian men were very smitten with London!
How did your own style develop?
Mary at home
When I came back to London, I just adopted a uniform of sorts – shorts and little T-shirts in the summer and jeans and boots in the winter. That was when I started getting interested in vintage fashion and loved finding great little shops and markets in London. I had a whole collection of original day dresses from the 1930s and 1940s – knee and calf length crepe usually, but with beautiful details. At the time you could buy amazing vintage clothes very cheaply. I wore them with original vintage high-heeled, peep toed shoes too. On top I would wear a little black or navy jacket. When I thought I’d sorted out ‘my look ‘ I started working for Notting Hill Housing Trust, which was very much an office environment. That was a bit of a shock for me as neither the shorts/jeans nor 30’s dresses were appropriate. I had to work out what to wear for work. That was an interesting journey for me. My mother would have loved that – that I had to discard the jeans and shorts and wear something a bit more dressy. She had always said my look was much too casual.
What sort of clothes do you like wearing for work?
After a brief period of shopping at M&S for what I thought was an ‘acceptable’ office look I realised spending the biggest part of every day dressed in clothes I didn’t love made me feel I was going backwards to the ‘grown up’ look I had avoided in Ireland. So I had lots of fun discovering a whole other level of gear – from Nicole Farhi, bits of vintage, to the ultimate – Vivienne Westwood – then I felt really at home. I developed a passion for cashmere and the trick became to just wear something fabulously expensive in a casual way – a beautifully cut jacket or a skirt with a really unusual cut, as if you had just thrown it on!
The breakthrough came when I thought I don’t have to wear office clothes. I can buy nice things that I love to wear and I will wear them every day rather than have them hanging in my wardrobe as ‘special’. Running Notting Hill’s charity the shops was a great way to keep me on my toes when it came to looking OK. There were so many fashion graduates and people with flair working in the shops, it always felt vital. I did buy things and still have a ridiculous pink velvet jacket with gold and pearl buttons that looks like something from Puss n Boots – a folie that 12 years later has yet to find its moment!
These days there is not such a separation between work and casual wear– the divide is more to do with holiday gear and London gear – obviously dressing appropriately for the weather.
Do you think older women dress badly on the whole? If so why do you think this is?
Cashmere dress
For years there has not been much choice for women over 50 – for some reason they had to look their age rather than feel good about how they looked. I assume women who could afford to buy expensive things followed a particular style for older women but ready-made clothes for older women were particularly limited and dull. I feel there is so much more freedom now around age, what you can wear and what is available . It helps to know where to look. As long as you get pleasure from pulling a look together, I really do think you can do it, even on a small budget. My honest opinion is that people have become lazy and are far less stylish than they used to be. Looking after clothes also seems to have lost its place, darning, mending and even altering things seems to belong to the past.
My husband often remarks “All you have to do is look at a platform of people in a tube station and almost everyone looks dull. The lack of style is depressing”. It’s such a shame when there is so much choice – perhaps too much choice ! I know problems come with age and at a certain point your feet demand comfortable shoes. It can be costly if you want them to go with clothes – you just have to put in the work and search for shoes that look good and feel good too.
My friend Sue made the Fabulous Fashionistas film which just proved that older women can look fabulous because they care about the way they look and get huge enjoyment from it, no matter how old they are.
Tell me about your favourites garments Mary
Ooh I love my Vivienne Westwood jackets and my hippy skirt from the Hotel California shop. I shall go home now and hunt through my favourite things!
Once the first fitting was complete I permanently stitched the side seams, unpicked and resewed the side back seams taking the jacket in at the hip area. To add a little ease in the waist rather than adjusting the vertical seams I simply released the back dart. This seems to have given just enough extra ease in the waist adding maybe half an inch at the waist itself (good job I did not cut the darts, as proposed in the notes). However in the final jacket I want these back darts so I will probably add wider seams in the waist area and create the half-inch overall by very slightly coming inside the sewing line at the waist on the five side and back seams.
For the hem I used crin (horsehair braid). This is attached one and a half inches from the bottom of the jacket to ensure the hem has a nice firm finish.
This jacket has a convertible collar. The collar is just and under collar and upper collar, with the undercollar and its interfacing cut on the cross in two pieces and joined, with the upper collar cut in one piece (on fold) on the straight grain. I attached the joined bias organdie interfacing to the bias undercollar with pad stitching, creating a satisfying roll.
Pad stitching
When this is pressed and sewn to the garment it produces a lively roll. I find it rather magical, how a piece of flat fabric becomes so alive with the bias cut plus the pad stitching. Although this is a convertible collar rather than a traditional tailored one, and the pad stitching is restricted to this one little undercollar, I so enjoyed making it. This is definitely one of my most favourite parts of tailoring and why I come back to making and wearing jackets all the time.
Collar attatched
Next I turned to the sleeves. I love it that older patterns invariably have a two piece sleeve with lots of shaping in it. In this photograph you can see how the sleeve has a distinct curve in it, to accommodate the elbow. The two pieces, plus ease, create this shape.This one has ease on both the front and back seams and a nice little button extension without button holes. On the final version I think I will make button holes too. Can also see how the crin holds the hem in place, and the tailors tacks for the sleeve buttons?
Completed sleeve
Inserting the sleeve requires putting this tube into the arm hole so that the fullness is arranged at the point it is needed. This pattern (although this is very uncommon in patterns from the 1940s) suggests a gathering stitch. This is not something I would do unless I was making a gathered sleeve. I always work the cloth in my fingers, using the back of my hand as a curved surface to pin baste the excess fabric into the jacket. I love doing this. Once it is nicely distributed I baste the sleeves and try them on. I regard to process as one of the most essential to creating a well-fitting jacket.
large amount of ease in the sleeve head
Once the sleeves are inserted we will add shoulder pads. This jacket was designed to have them, and I find they give a nice shape to the shoulders. The armhole is cut just a little larger to accommodate them, and they also help fill out the area in the front chest where there is a little indentation. I also often use sleeve head wadding too, just to give the sleeve head a little support. In fact because this fabric has quite a lot of nylon in it, it is not ideal for tailoring and it needs more support than the final version of the jacket (in a heavier, pure wool) will need.
I finished the hems but folding over the crin and attaching to it. I completed the button holes by cutting into and fixing the facing. I found some nice shell buttons at McCulloch and Wallis. Like most natural products (leather, wood, horn, etc) shell often has a natural variation in colour. I like this look as it makes the buttons more “lively” and it ensures that the buttons blend with the light and shadows on the jacket, and avoids the need for a perfect match. I actually chose plum coloured buttons originally but when we opened the tubes we found they were navy and the buttons I had chosen were just faded ones. That was a shame, so I settled for red. It is only a toile, after all.
In terms of lining I bought some cheap £5 a metre silk – it’s very light weight and I will not use it again. I normally pay twice that for lining silk and this one is just too flimsy to do the job. It might be OK for lining a blouse but it was not much fun to work with. I got navy (it was that, or black) and I think that is nice and smart. But when I do the proper job I will use a heavy satin lining I think – probably one I can paint on, or tie dye.
The SWAP contest requires that all the garments go together. While there are three “sets” here, which stand alone, the three “wildcards” are garments which work with the three sets. Also I have designed my collection as a “wardrobe” in which everything goes with everything else.
When it comes to photographing the 11 garments at the end of the sewing period (the first few days of May 2015) I will want to put together some combinations that show the versatility of the wardrobe I have designed (mainly using purchased patterns) and made. Last year we were allowed no more than 8 photographs. So before I actually put thread to needle I want to just test out, in my imagination (and yours too!), how this might work. At this point I need some drawings to show you what I mean.
Which leaves four more outfits I am thinking of putting together. It’s a bit like Sudoko – you have to try to use each item once, but only once. These, with the sets, would create 8 photographs if that is what the rules allow. Is this the best combination?
1 + 8 + 9 = Shorts suit (blouse not seen)
2 + 6 + 11 = Smart Saturday
3 + 5 = Presentation
4 + 7 + 10 = Weekend
Showcased outfits
Combinations I might actually wear
The other way to think about this is just to choose what I would like to wear, not caring how many times each item is used (beyond the first four matching sets). How about this?
5 + 10 +11
4 + 7 + 10
7 + 10
2 + 6 + 11
This combination leaves out 1, 3, 8 and 9, whereas the grey RTW jersey appears three times, and garments 7 and 11 appear twice.
One of my friends was going to a job interview. He had to appear before the Board twice, and wrote to ask me “Should I wear a tie?” My default answer was “Yes”. Yes for job interviews, TV appearances, , an initial meeting with a new client or customer, Board meetings any formal occasion. When he clarified that the second interview was over dinner I suggested a suit and shirt, without a tie.
Ties have become much less important over the past decade, with only 6 per cent of men wearing a tie every day, and the rules are no longer clear. If you aren’t sure, it is probably best to go more formal, not less – dress up rather than down if you are making an appeal to power.
So is it OK to go tie-less these days? Clearly if you wear more casual clothes like jeans and jumpers, polo shirts or button downs, a tie is not especially appropriate. But if you wear a suit because that is norm at work, or because you are a manager, or because you like to look smart, then a tie is now optional, rather than required. These days lots of men are wearing suits without ties, and leaving the first button or two open, and they generally look good. Smart, but also relaxed. In any industry that sees itself as modern leaving off the tie means “I am approachable”. It says “I am not trying too hard, I am not uptight, I reject old-fashioned male stereotypes.” Hugh Grant usually looks great in a suit and an open-necked shirt.
Hugh Grant, suit and no tie
In a way it is similar with women. Women no longer have to wear a suit to work. We can wear co-ordinating separates, or a dress and informal jacket. The rule, it seems to me, is that on the occasions when a woman would wear a suit or formal costume then men should wear a tie. When I would wear separates, or a dress and cardigan, or something a bit unstructured men can be tie-free. It is not a very clear rule and I would add that for men with a more contoured shape, or those carrying a bit of weight, a tie will look better than an open neck, as skinny Mr Obama shows. James Corden’s tie is doing something very important for him – it is creating a strong vertical stripe down the centre of his body making him look much slimmer than if he was tie less.
The nice thing about a tie is that it is one of the few elements where men can express their design choices and wear some colour. It can create a bit of individuality in a world where everyone has a grey or blue suit. For men who suit bright, light or warmer colours, the tie can be a great opportunity to bring in a colour that works better with your complexion. I feel sorry for men who, having been given a tie as a present, then feel obliged to wear it. Encourage the men you know to express themselves with their ties!
My husband went to a National Aids Trust event and was standing on his own. He was wearing a navy Jaeger suit and colourful silk tie. It had a tasteful patchwork print in red, navy, black, white and yellow. It contained some floral elements and polka dots. He realised that a tall, beautiful woman was starting at this tie. He looked at her and after a few moments realised she was Princess Diana.
Princess Diana
If you wear a tie consider the colour, the pattern, the width, and composition. Here is Jon Snow who has some nice ties, many made by Victoria Richards. Victoria has a studio in South London and I have bought many ties from her, and if was she who inspired me to take up painting on silk. I don’t think Jon looks great without a tie – perhaps a bit washed out, with the open shirt revealing a somewhat scraggy neck. He really suits cool and bright colours and the two colours here are nice. But the horizontal tie is much better on a slim, tall man with rather a long face, compared to the blue vertical stripe. Generally choose a pattern that flatters your face and body shape.
angular men can choose geometric designs, strong stripes and harder lines
straight bodied men need a softer look, patterns that run in lines for example
contoured men can wear more abstract patterns, paisley or small dots.
smaller men should choose smaller patterns, ensuring the tie is not too wide; wear a vertical stripe or a stronger single colour to create length
heavier men should wear a vertical stripe or plain deeper shade, making sure the tie is not too narrow, and long enough to reach the waist line of the trousers.
a bow tie was always regarded as a bit pretentious even if you were an architect, academic or gynaecologist. I love them with a dinner suit ( it needs tying rather than clipping on) but they need a fair amount of confidence to pull off with business wear. But just as beards and moustaches are having their day, I am sure the bow tie will have it’s moment too.
Bow tie
Never wear (or give) a polyester or gimmicky tie. If a tie gets a snag, or a grease stain, bin it.
novelty tie
My male colleagues keep a tie in their office in case they need to dress up quickly. Here is journalist Jon Land, on his way to meet the Housing Minister, The tie is nice, and overall colour scheme is great, but I think the shirt would have been better buttoned up. Put simply – open shirt/no tie; buttoned up with tie. OK?
Three years ago I went to see an amazing exhibition at the Victoria & Albert Museum, featuring the works of Yohji Yamamoto, who I had never heard of before. We were lucky enough to see one of the catwalk shows on very uncomfortable benches. I found the exhibition itself stunning and challenging, but at the time I was not sewing so I just enjoyed gazing. Of course I wanted to lift up the garments and have a good look inside, but that was forbidden. The V&A has some useful information if you want to read more about this designer.
Yohji Yamamoto exhibition at the V&A
Here are a few Yamamoto items that are bound to impress. This man is so creative and I feel he creates attractive wearable clothes too.
Recently my friend Galina said she was working on a jacket, inspired by a Yamamoto suit. She sent me a photogaph of her work so far. The jacket appeared to be amazingly complex, and I was very intrigued to see how it was made. I have a love of clever cutting; if it is also flattering to the female (or male) form I am smitten. This jacket certainly meets the clever and beautiful criteria.
Copy of Yamamoto jacket
I made the long trek to her studio in Greenwich to get a better look. We drank delicious tea (www.basilurtea.co.uk), ate home made walnut cake, and I admired Galina’s new shoes (www.etsy.com/uk/shop/kilms). Galina took me through her thought process, starting with a photograph, then researching it, then tentatively trying out a scale model in paper, and then, by hand with (deliberately?) mismatched cotton, hand back-stitching the quarter-scale jacket. And here it is! When this happens – the eureka moment – a three-dimensional garment arises from the fabric. Now the pattern cutter is elated. She has created something novel – based on the kimono; simple but complex, full of life and movement.
The little jacket
We talked some more and agreed terms for the construction of a suit in some lovely fabric. How exciting for me to commission her to make me an outfit. She chose the fabric and lining and I was thrilled. I also went away with the pattern so I can make a jacket for myself, in due course. Right now I have ten or eleven garments to make for the SWAP challenge. But after that (or maybe during) I will locate some suitable fabric – probably with a distinctive weave or stripe – and have a go at this jacket myself. I hope to see Galina for a fitting, and a sad goodbye as she returns to Riga, in the early new year.
In the meantime if you want to try making a Yamamoto design there is a free pattern. Here is the web address: http://showstudio.com/project/design_download_yohji_yamamoto
I hope this works – if not search Yamamoto free pattern on google.
I don’t like buying Christmas presents. I find it stressful, and I hate being under pressure to buy. So generally I give my children money and try to make something small, as an expression of my love, as well. Last year was very successful in that I made covered note books and diaries with my hand printed cloth or African fabric, for the men, and (fake) fur collars for the ladies.
This year I considered my printing swatches and thought about how I could use them.
Printing samples
By and large they are covered in beetles. Previously we had printed saleable items to support the centre. My calico shopping bag, printed with blue and green beetles, then overpainted with turquoise and navy metallic paints, had gone for £15! Maybe I should have made more bags?
Looking at the samples I thought maybe I could make cushions (and a few covered books with the smaller pieces) this year – who doesn’t need an extra cushion, to add to the sofa, or put on a bed, or use to make a little boy or Great grandmama more comfortable at the table? I hope I have enough fabric to make one for everyone. I showed Gus my handiwork and he choose the same grey fabric as I have for my blouse, but said he would prefer it with gold or mustard on it. He has recently spruced up his flat with new carpets and soft furnishing (he doesn’t seem to have learned the value of “plumping up the pillows” yet, but he will learn). His colour scheme appears to include dark grey, light grey, white, mustard and turquoise.
John Lewis selection
I decided to make cushions with the printed fabric, and as I had one half lesson to go (before our little party) I bought a metre of mustard linen. I planned to get a few dark grey beetles on this fabric, plus perhaps some light turquoise shapes.
Mustard linen
So at the last meeting of term I arrived with a plan and worked hard for two hours. This is what I made. The shimmering gold and blue beetles are so exciting.
The grey and gold cloth was made in a similar way to my grey and silver beetles, but using a flat gold foil instead, followed by applying metallic fabric paint in gold, pearl white and turquoise on the preprinted white/silver beetles. The idea with this is to make a large cushion.
The mustard also turned out nice with a dark grey screen printing ink. I mixed quite a lot of black pigment with a bright white base, and the effect was rather nice. In fact so nice I didn’t really want to cut it into cushions. I asked Gus if he would prefer a throw, so as not to cut into the metre long piece, but he said a throw should be soft and cuddly – I do tend to agree, but thought the fabric would look quite impressive, draped on his black sofa (so all his friends might admire his mothers’ work – how craven of me!). Esme said she would like a skirt from the fabric. I am now wondering if I can get a skirt and cushions from it. Gus said his girlfriend would like a dress, and suggested this style. It’s a film called Moonrise Kingdom.
Moonrise Kingdom dress
A dress like this, in the mustard fabric, perhaps with plain collar and cuffs might be nice, don’t you think?
The other thing on my mind was piping the cushions. I have never piped anything before – I don’t even put zips in cushions, preferring to just sew them up quickly (and resew after laundering). There are less than two weeks until Christmas. No wonder I was offering a throw – something I could “throw” together in ten minutes…
My pattern (Simplicity 100) is quite a small size (32″ bust, 34″ hips). While I anticipated the fit at the shoulder and neckline would be fine, ease, styling and other factors often mean a pattern will make up bigger than you think. I carefully measured the actual pattern pieces, as I invariably do. In this case I was happy with the girth of the shoulders, upper chest, bust, and waist. However the hips appeared (and should have been) too small. By several inches. I therefore added additional width at the lower part of the jacket (below the waist line), adding a total of four inches across the back hip.
First fitting
This jacket has eight separate bodice pieces; therefore there are seven seams where the fit can be adjusted. It also has four darts which can be altered.
Before constructing the toile I thought about how best to check the fit. Often I machine baste a garment together and just try it on. But because the pockets are part of the design and an integral part of the construction I needed to make them up first. So I made up the front pockets, darts and seams, pressing as I went. Then, instead of stitching in the interfacing and making the button holes I basted the facings by hand ready for fitting. I thought I might need to move the CF slightly if the neckline or bust was too tight. I then made up the four back sections and pressed them. I stitched up the shoulder seams and trimmed the interfacing. I machine basted the side seams, and pressed lightly, in order to try the jacket on for size.
Overall I was pleased with the fit (despite my blank look), especially at the (unaltered) front. The waist is in the right place, although it maybe a little bit tight, and the darts work well. The pocket looks nice and opens just a little, as intended. There may be an issue across the upper chest, but I can’t be sure until I get to the sleeves. If this problem ends up materialising I may be in trouble, but right now the jacket feels comfortable ie not too small.
Front view
But now let’s look at the back – where I added the extra four inches. What do you think? It’s way too much, isn’t it? I added twice as much extra ease than I should have done.
back view
It fits pretty well in the upper back, and once the sleeves are in I think the shoulders will be fine. However I will share another back view in the interests of fitting science – it is a bit of a shocker.
does my jacket look big?
Although I am annoyed that I added too much width, this is an easy problem to fix. I will reduce the back seams by about half an inch below the waist at the back and trim the pattern pieces down to pretty close to how they started. I am surprised how good the fit is. All I can think is that the jacket had quite a lot of ease overall, for wearing over a sweater, and more at the hip in order to skim the tweedy, pleated skirt. However if I had 34 inch hips I think I would be swimming in this jacket.
But, making a fitted jacket, and one with so many seams and details, is really hard. Every time you fiddle with the fit you risk creating a problem elsewhere. While it is nice to wear a jacket that “fits like a glove” that means it has to fit at so many different points that it can take ages to get the toile just right. And fitting yourself is almost impossible (these photos are how I see myself from behind).
Construction
My next step is to finish the bodice, including the button holes and then add the collar. Then I will review my work.


You must be logged in to post a comment.